Trusting yourself + Everything Seasonal Bread

I know I’m not the only person who reads cookbooks like novels. (Especially since they are more and more often one-part memoir and two-parts recipes.) I always have. My motherFullSizeRender (1) 
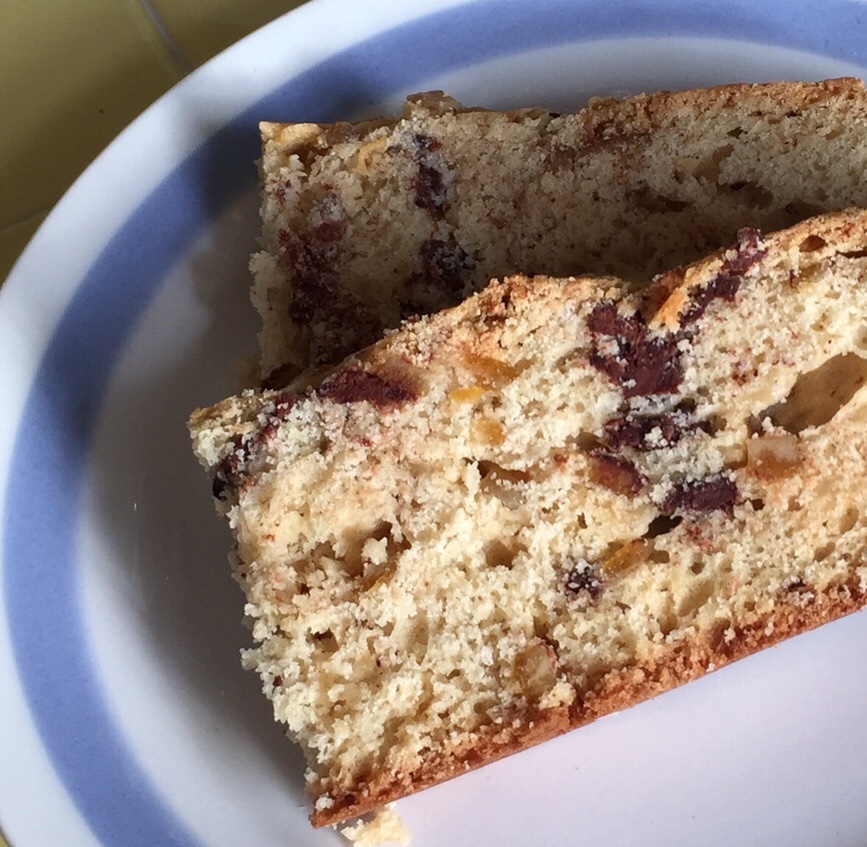
had some real oldies I liked to read sitting at the kitchen table while she cooked. I adored the Better Homes & Gardens gingham book for its ring binding. I spent many childhood hours moving the pages around, sorting favorites or putting together “menus.” To this day, the BHG Baked Custard recipe is my go-to for almost instant homey gratification. (And, ps, if you use ½ milk, ½ heavy cream, it sets up with a moussey texture on the bottom and shiny custard on the top. Complete happiness.)

All that childhood reading has contributed to a sense for flavors and which will be complementary (on both the savory and sweet side). While I don’t have the most adventurous palate (“delicacies” are not my thing), I do think it’s fairly sophisticated. I can tell by the way a recipe is written whether it’s great or just serviceable, and I know when it will work and when it won’t.

Usually.

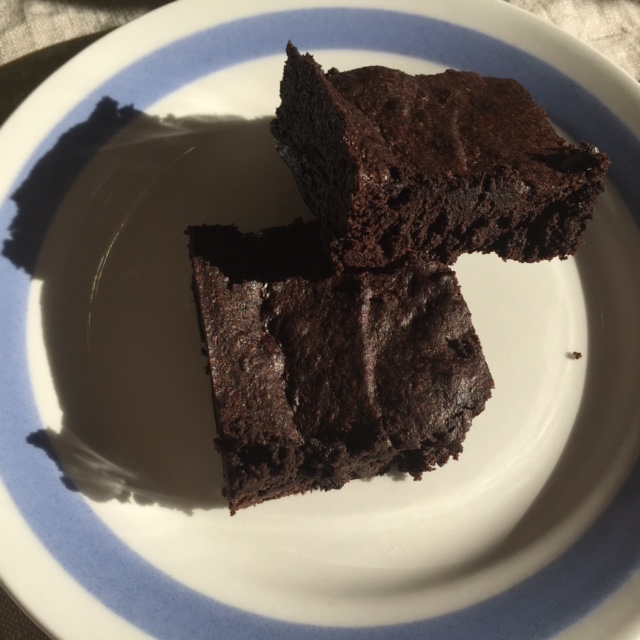
On the weekend I made a chocolate cake using a recipe from a respectable source. I had reservations – it called for cocoa and buttermilk which don’t harmonize for me – but since it was only one stick of butter, I gave it a go. Oy, friends. Bad. The overly sweet batter tasted “chocolaty” and the cake was…. Well, it was pretty: Dark. Good crumb. Good texture. It just tasted terrible. Thinking it might be my palate, I offered it around. No one cared for it. Well, one of my neighbor’s said, “It’s good. But I don’t want any more of it.” I let it sit for a day, loosely wrapped in plastic, to see if anything would meld or bloom. No. Bad. I trashed it (along with, apparently, all photos of it).

Lesson: Trust yourself. In the kitchen and in life.

IMG_2840
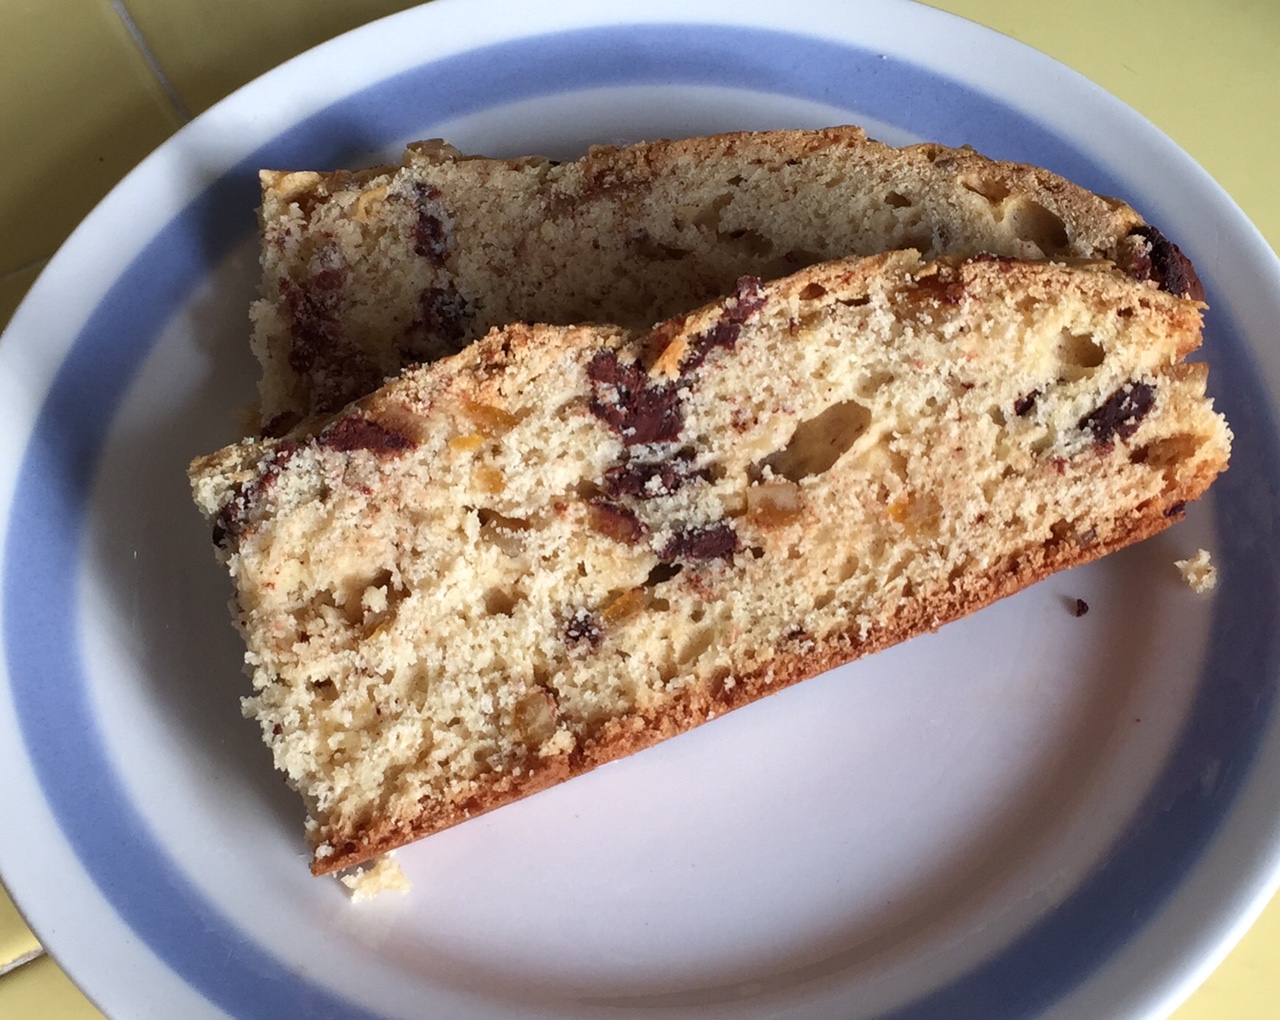
So then I had the rest of a quart of buttermilk. And it is autumn, which calls for cozy, which calls for bread. Specifically Dark Chocolate Orange Soda Bread. Super easy, super fun, and super delicious. You can never go wrong with chocolate and orange, and it’s bread! Who cares if I have to run the AC in order to turn on the oven?

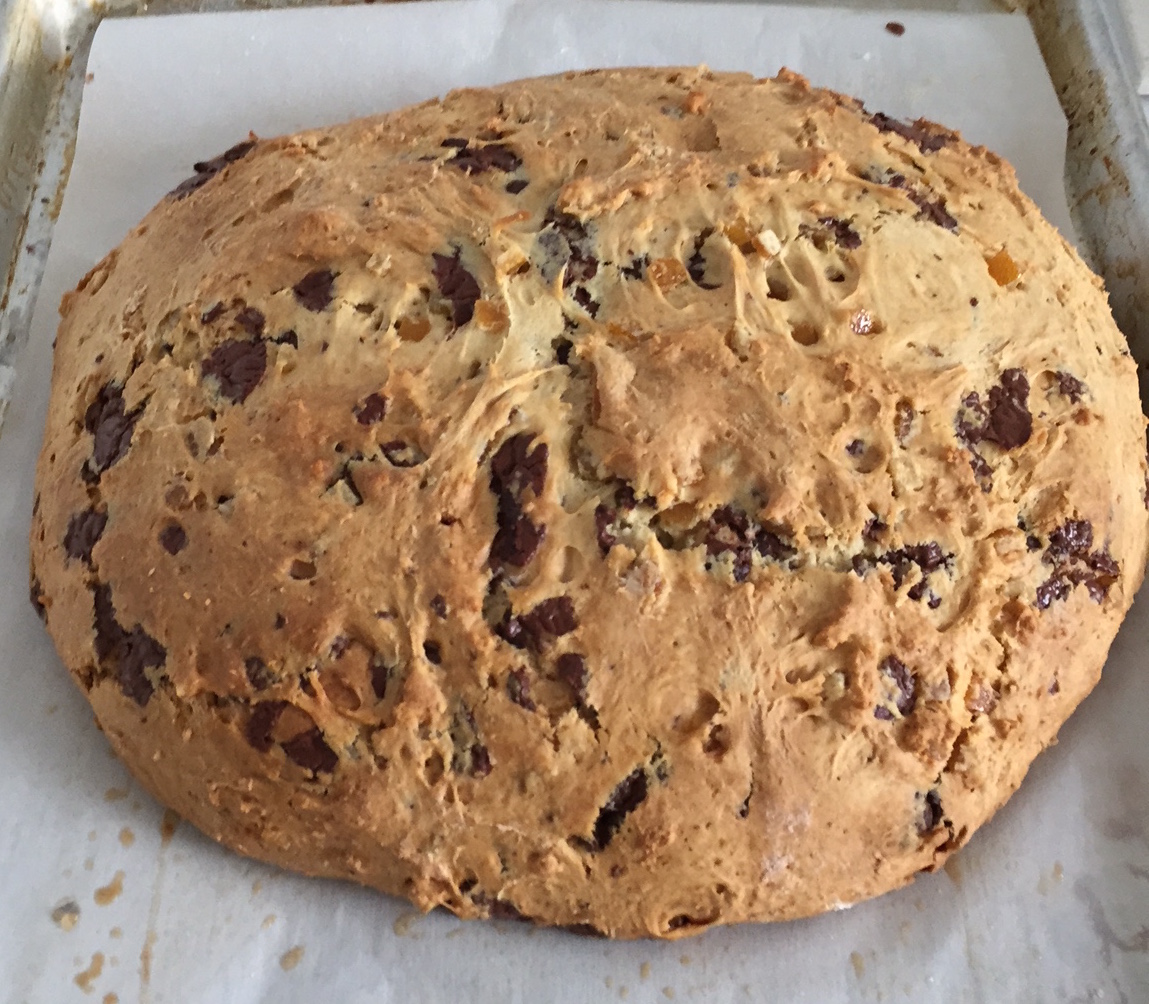
This is a recipe from Epicurious. I don’t make any changes to it. The dough is sticky sticky sticky. Scarily so. Be brave, dear reader, and don’t add a ton more flour to make it easier to handle! Just roll it around on your lightly floured work surface until you can take your hand off it without taking half of it with you. It can be done. I have a “vintage” kitchen that has tiled countertops (the horror!), so I work on a marble slab. And use a bench scraper to nudge my mound of dough off the marble and onto the prepared baking sheet.

I first made this last December for a holiday event. The dough was so crazy sticky that I just mounded it onto the sheet and said a prayer. Holy patron saint of bakers, is this stuff delicious! I mean seriously. For its ease and nothing fancy ingredients, it comes together like a trip to heaven. I’d never made soda bread before. I think I’d had it once at a St. Patrick’s dinner 30 years ago and that version was too rusk-like for me. The chocolate and orange drew me in like a moth to a flame. And, turns out, that 30 year old memory? That was just a bad loaf.

IMG_2836
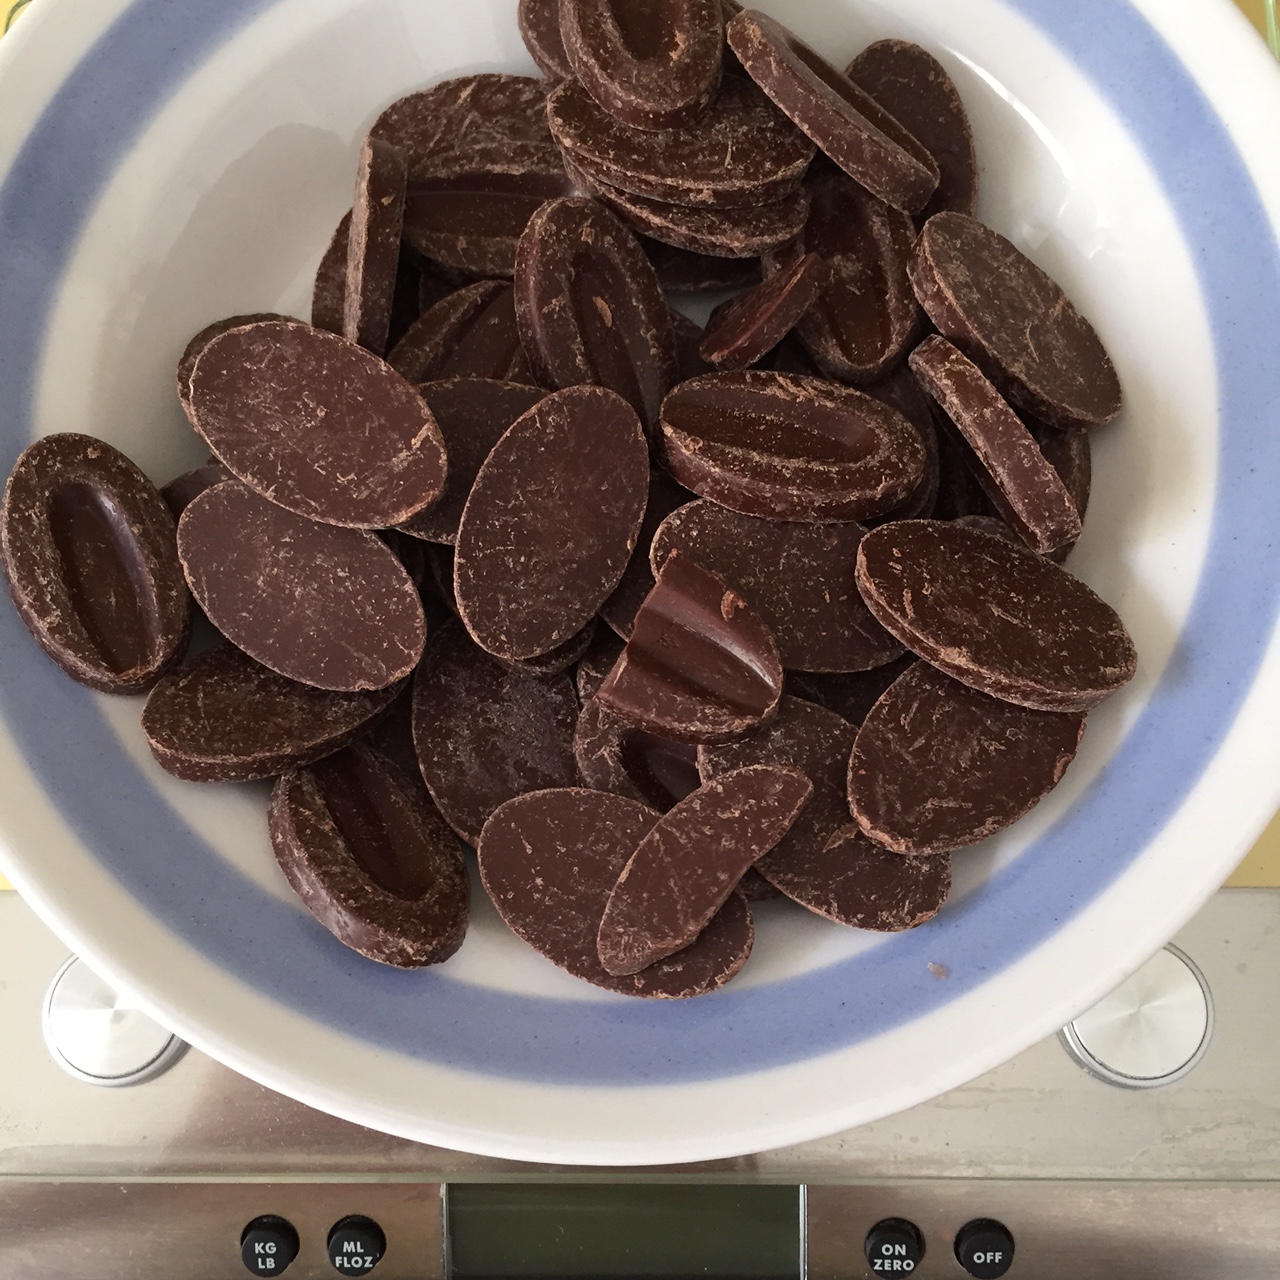
As to ingredients, I use Valhrona Manjari 64%FullSizeRender coarsely chopped and candied orange peel from local cooks’ store (oft mentioned here), Surfa’s. I’ve made this bread many times since, using orange peel from the Berkeley Bowl (similar to Surfa’s) and from the supermarket. The supermarket tubs (usually available only around the holidays) are a sweeter, stickier product. The orange bits tend to clump together in the bread, but it still tastes wonderful.

Important: Mind the time! Because the dough is so difficult to manage, my loaves have turned out differently every time. Sometimes wider and flatter, sometimes taller and more compact. The recipe calls for 70 minutes baking. I have never needed that much time, neither when using a fancy calibrated Wolf range nor when using the Home Depot special oven in my current place. The loaf needs to be brown, firm, with a tester coming out clean.IMG_2841 Check it at 40 minutes. I’ll be surprised if you need more than 60 total. It tastes as wonderful regardless of how the loaves appear.

It’s best to let this bread fully cool before cutting. Then you can slather it with butter, toast it, do whatever you like to do with bread. Baked up with a little vanilla custard, it also makes a nice bread pudding.

This baby will take you straight from Halloween through Thanksgiving, Christmas and New Year’s brunch.

It’s that good.

Dark Chocolate Orange Soda Bread

From Epicurious

Ingredients

3 c unbleached all purpose flour

½ c plus 2 Tbs sugar

2 tsp salt

2 tsp baking powder

½ tsp baking soda

6 Tbs (3/4 stick) chilled unsalted butter, cut into 1/2-inch cubes

6 ounces bittersweet (not unsweetened), cut into 1/3-inch pieces

6 ounces candied orange peel, diced

1 ¼ c buttermilk

1 large egg

Preparation

UntitledPosition rack in center of oven and preheat to 350°F. Line rimmed baking sheet with parchment paper; butter parchment. Whisk first 5 ingredients in large bowl to blend. Add butter; rub in with fingertips until mixture resembles coarse meal. Stir in chocolate and orange peel. Whisk buttermilk and egg in medium bowl to blend; add to dry ingredients. Stir just until incorporated.

Turn dough out onto floured work surface and knead gently just until dough comes together, about 5 turns. Form dough into 6 1/2-inch-diameter round, about 2 to 2 1/2IMG_2839 inches high. Transfer to prepared baking sheet. Using sharp knife, cut 1-inch-deep, 3-inch-long slits in top of bread, forming sunburst pattern.

Bake bread until well browned and very firm when pressed and tester inserted into center comes out clean, turning baking sheet halfway through baking, about 1 hour 10 minutes total. Transfer bread to rack and cool completely, at least 3 hours. (Can be made 1 day ahead. Wrap in foil and store at room temperature.)

FullSizeRender

Advertisement

Feelin’ Like Fall Peanut Butter Cookies

It’s been a tough autumn here in Southern California. Temperatures have been close to IMG_2682100 degrees all across the Southland, with regional blackouts due to 24/7 AC and beach dwellers who are normally proud of their “we don’t need AC” status, flocking to packed movie theaters for relief. There have been a few classic SoCal fall days mixed in, though, with breezy temps in the low 70s and cool nights that might tumble into the low 60s – those are baking days.

This past weekend was cool and cloudy, perfect for making soup and peanut butter cookies. I like my peanut butter cookies crisp with a hint of chocolate, so I use equal amounts of white and brown sugar, and add cocoa nibs. It’s the perfect cookie: Easy to pull together and, with a couple of hours of Hulu to catch up on, the right amount of baking time.

Feelin’ Like Fall Peanut Butter Cookies

Yield 2-3 dozen

Ingredients

1 ¼ c flour

¾ tsp baking soda

1 c (2 sticks) unsalted butter, softened (beat cold butter between wax paper sheets with a rolling pin)

½ c light brown sugar, packed

1 large egg

¾ tsp vanilla extract

1 c chunky peanut butter (I use Skippy)

½ c cocoa nibs

Preparation

Preheat oven to 350 degrees. Line two baking sheets with parchment (parchment makes a crisper cookie than Silpat).

Combine flour and baking soda in a small bowl and set aside.

IMG_2680Beat butter and both sugars in the bowl of an electric mixer on medium until fluffy. Add the egg and mix until combined. Mix in vanilla, then peanut butter. Beat well. Scrape down the sides and then add flour mixture. Beat on medium speed until well combined. Mix in cocoa nibs.

Remove bowl from mixer and give the dough a few turns with a wooden spoon or spatula to make sure the nibs are thoroughly mixed in.

Use a small ice cream scoop or rounded tablespoon to scoop up dough. Roll into balls and placeIMG_2684 on cookie sheets, spacing about 2.5 inches apart. Sprinkle generously with crystal sugar.

Bake, rotating sheets halfway through baking time, 20 minutes. Cool on rack.

Enjoy! Great with tea or cold milk. (The crispy makes ‘em dunkable.)

Twenty-Minute Toffee a la Rose

Candy. Candy candy candy. I reflexively think of myself as a candy lover but when I visit places like Dylan’s Candy Bar, I’m overwhelmed by colorful options and fruity aromas. I’llIMG_5946 eat Red Vines (or Twizzlers as we call ‘em back home), Mary Janes, and the occasional Dot. But what I’m really after are the M&Ms, Reese’s, Snickers, and Milk Duds.

So, OK, I like chocolate. As distinct from candy. So where do the twain meet? In toffee. And why not? Such a delectable happy marriage. Full disclosure: Wrap chocolate around sugar cooked anywhere between 245° and 290° F and I’ll eat it. But toffee is special. Buttery maybe? With the chocolate and the nuts? I love it and will enjoy everything from an Almond Roca all the way to fancy artisanal products. I’m not beyond paying $15 for 8 ounces of handmade goodness.

Second only to eating toffee is making it. It’s so dang easy, people. Just make sure you toffee4have a good thermometer and work carefully. I’ve made many toffee recipes but my go-to, all time fave is from Rose Levy Beranbaum – Mahogany Buttercrunch Toffee. The key? Brown sugar. Oh my my my my. I use the recipe from her book Rose’s Christmas Cookies. I’ve made it so often, I can make it from memory. (Which is impressive to people when we’re sitting around and I say, “Toffee anyone?” and then pop into the kitchen and whip some up.)

Like I did this week. OK, the only people sitting around with me were a dog and two cats who don’t eat toffee but I like to think they’re impressed by my efforts. It was one of those nights – I want something, what do I have on hand? Brown sugar, butter, chocolate, almonds. Always in the pantry. It takes about 20 minutes. The toffee hardens almost immediately, the chocolate takes some time. So when wanting instant gratification, I put the tray in the fridge for 15 minutes. Nom nom nom.

A touch of nostalgia

61f9a96ecd1c78fcdab784dc35ca72d7In writing this piece, I thought about my earliest toffee memories. While not toffee per se, what I remember is Callard & Bowser Butterscotch. It came in a white package wrapped in cellophane. Each piece was a tablet about an inch long wrapped in foil. I think my grandfather turned me on to this, it seems like he always had it on hand. I’m not generally into butterscotch (you can keep your Werther’s and your Pick-A-Mix disks), but this was something altogether different. Heavy on butter, light on sugar. I came across this lovely ode to the C&B Butterscotch on candyprofessor.com, which is itself a lovely blog that appears to be not currently active. She expresses the wonders of this wonderful confection better than I could.

Toffee Lessons Learned

  • Focus, focus, focus. I don’t think anyone wants to see a picture of the scar on my forearm from the time I wasn’t 100% focused on the task. Take it from FullSizeRender_2me – 250° sugar syrup on the arm is painful. (Also, if anyone is also still under the delusion that butter is meant to resolve a burn, forget it. Cold water is your only response.)
  • Trust your thermometer, but verify. Boil water and put your thermometer in. Account for any degrees above or below 212°F or 100°C.
  • Chocolate. Less is more with the darkness here, IMO. I use Valhrona Manjari (64%) or Caraibe (66%). If the chocolate is too dark, I feel like that’s all I taste.
  • Almonds. I don’t toast them. And I use less than suggested. I’m not in it for the nuts.
  • Prepare your workspace. Pre-measure your vanilla and baking soda and set near the stove. Set your prepared baking sheet nearby as well. I set up an assembly line of stove – potholder on counter – pre-measured vanilla and baking soda – prepared baking sheet. Once the sugar syrup is the right temperature, speed is of the essence.


Mahogany Buttercrunch Toffee

Adapted from Rose Levy Beranbaum

Ingredients

1 ¼ c blanched, sliced almonds, coarsely ground (toast if you want, I don’t)

1 tsp. vanilla extract

1/4 tsp. baking soda

1 ¼ c firmly packed light brown sugar

2 Tbs water

½ c (1 stick) unsalted butter

3 oz. semisweet chocolate (64% cacao), coarsely chopped

Line a rimmed baking sheet with a Silpat or butter generously, and set near the stove. Set your pre-measured vanilla and baking soda nearby as well.

Preparation

Sprinkle about half the nuts over a 7 x 10 inch area on the cookie sheet. Set it near the stove. Have the vanilla and baking soda nearby as well.

In a heavy-based saucepan, preferably nonstick, combine the brown sugar, water and butter. Bring to a boil, stirring constantly (trying not to disturb the thermometer), until the mixture reaches 285°F on a candy thermometer. Mind the heat: The first few times I made this, I had the heat too high and the syrup cooked too fast and scorched. While Burnt Caramel is trending in ice cream, it’s not so nice in toffee. Medium high heat, please.

Immediately remove the saucepan from the heat [onto the potholder] and stir in the vanilla and baking soda. Pour the toffee mixture carefully and evenly onto the nuts, keeping within the 7 x 10 rectangle.

IMG_5946Working quickly, scatter the chocolate onto the toffee. Press the chocolate lightly with your fingertips so it starts melting.

Let it sit for five minutes so the chocolate is soft enough to spread in an even layer over the surface of the toffee. Dust the chocolate with the remaining almonds. Leave the toffee to cool completely, then break it into irregular pieces, or refrigerate if you just can’t wait.

You can store the toffee in an airtight container at room temperature for up to a month. But you won’t have to. I keep it on the counter in a Ziploc bag. It lasts aboutoffee3t a day and a half.

Chunky Toffee: Sometimes I want thick pieces. When I do, I generously butter the bottom of an 8×8 square pan and sprinkle with the nuts. Everything else is the same except I go a little easier on the chocolate. When ready, I poke it sharply with a knife point to break and then go from there.

Note: Apparently Rose has updated the recipe in her latest book The Baking Bible. She now puts chocolate on the bottom and the top, as described delightfully here.

Pitch Black Cocoa Brownies

I was going to title this “The 40 Stroke Brownie” but my editorial staff felt that could go offIMG_2531 in too many unintended directions. Whatever. I still feel it’s interesting to note that many, many recipes instruct one to “beat vigorously for 40 strokes.” Not sure where it comes from and a Google search was exhausting scrolling through pages of health-related results. (Point taken, editors!) What I find, though, is that those 40 strokes with a wooden spoon are magical – your batter transforms into something satiny and wonderful. And whatever you’re baking is heightened – heavenly textures.

40 strokes of beauty

40 strokes of beauty

As was the case yesterday when, in mid-afternoon, I was toiling away at my desk and thinking I’d like something chocolate. And knowing there was nothing to be had at the moment (having finished my usually reliable supply of frozen chocolate bars). What to do?

Basic brownies. One bowl. 45 minutes from start to finish. Let’s go!

I was interested primarily in speed and ease so considered making from memory the recipe from the Baker’s box. But instead I once again invited Alice Medrich into the conversation and pulled together her Cocoa Brownies tout suite.

Because she’s Alice and therefore the bomb, her recipe includes a little discussion about cocoa and the flavor profiles when using natural (nonalkalized) or Dutch-process (alkalized) cocoa. She remarks that Dutch-process cocoa delivers a flavor reminiscent of Oreo cookies. Interesting. I use Droste Dutch-process cocoa and have never noticed the Oreo effect. I have noticed it, though, quite robustly, when using something called “Black Onyx” cocoa.

AccordingIMG_2532 to the Savory Spice Shop website, “[Black Onyx] has been alkalized to the extreme, producing a dark, purplish black cocoa that makes for an impressive black-as-coal baked good. This extreme alkalization neutralizes the natural bitterness, removing some of its chocolate flavor and a lot of its butter fat (10-12%).” I discovered it at my local heaven, er, specialty food shop, Surfa’s. It’s definitely black and definitely delivers the Oreo notes. You’ve got to be judicious in its use unless you love Oreos that much.

Yesterday I was also out of Droste, but did have a tub of Hershey’s cocoa in the cupboard. So I measured two ounces of Hershey’s and one ounce of Black Onyx into the recipe.

The results? Black as night, Oreo note present and accounted for, moist and slightly chewy texture. And exactly what this hardworking girl needed to get through the afternoon! I do believe it’s those last 40 strokes that make the texture so delightful.

Because the brownies are so intensely dark, these would make an excellent Halloween treat with just a single candy corn slightly off center on top.

Enjoy!

Pitch Black Cocoa Brownies

Adapted from Alice Medrich, Chewy, Gooey, Crispy, Crunchy Melt-In-Your-Mouth Cookies

Preheat oven to 325. Butter an 8-inch square pan, or line with parchment or foil, creating overhangs. Set aside.IMG_2530

Ingredients

10 tablespoons (1 ¼ sticks) unsalted butter

1 ¼ c sugar

2/3 c (2 ounces) natural unsweetened cocoa powder such as Hershey’s

1/3 c (1 ounce) Black Onyx unsweetened cocoa powder

¼ tsp salt

1 tsp pure vanilla extract

2 cold large eggs

1/3 cup plus 1 Tbs (1.75 ounces) all-purpose flour

Preparation

Position a rack in the lower third of the oven.

Melt butter gently in heatproof bowl in the microwave. Add the sugar, cocoa powders and salt to hot butter, stir to combine, and set aside to cool until just warm.

Stir in the vanilla with a wooden spoon. Add the eggs one at a time, stirring vigorously after each one. When the batter looks thick, shiny, and well blended, add the flour and stir until you cannot see it any longer, then beat vigorously for 40 strokes with the wooden spoon.

Spread evenly in the prepared pan.

Bake until a toothpick plunged into the center emerges slightly moist with batter, 20 to 25 minutes. Let cool completely on a rack.

Remove from pan and cut into squares.