Fresh Strawberry Pie and Loss

Loss is a part of life. A lesson most of us are taught from a youngish age, but one we don’t really learn until it happens. My mother passed away 30 years ago and it could have been 30 minutes ago. One of my closest friends, a friend of some nearly 30 yearsimg_2836.jpg, was given an ultimatum about our friendship and he chose other than the friendship. My soul sister beloved friend passed away just over two years ago. And now another most cherished friend has passed just a few days ago.

I’m an introvert. A bona fide INFJ. As such, I choose for quality, not quantity when it comes to people. Each loss is a chunk falling off of me that leaves a space that can’t be filled. As I write this, I wonder if this is how I will journey to my end, more and more pieces falling away until there’s just a skeleton and a heartbeat.

Loss is an abyss. There’s no telling how long that sense of freefall will last (I think it lasts forever) or for how long we will continue to compose texts or intend to call, share, tell before gasping with renewed understanding. The permanence is the thing that most takes my breath away. You cannot understand “gone for good” until you live it, one day at a time. When people ask if it gets easier, I always say no. The depth of pain remains the same, I just get stronger in carrying it.

That said, I’m not a good griever. Or at least not a cinematic one. Tears come in bursts, there’s some sleeping, and staring out windows for what turns out to be long periods of time. But the raging, wracking grief processing that’s indistinguishable from birth, I don’t do that. Maybe once, when my mom died, for about an hour.

No, I get knocked out of my shoes and keep walking. Not saying it’s healthy. Just saying it’s what I do. And most often, I walk into the kitchen.

IMG_5411Numb, pulling out butter and eggs, collecting measuring spoons and cups, gathering bowls. I most often make Finnish Pulla, a sweet coffee bread my mom made. I know it by heart and it offers all the good soothing yeasty, kneading qualities. It tastes like home when “home” feels unmoored.

Next I will make something that reminds me of the person I’ve lost: Something I know they enjoyed or something I’ve made for them that they loved. Preparing food for someone who is gone is the best way I’ve found to bring them back. I can talk to them. Remember them. Love them. Eat with them again.

It helps.

Maria’s Favorite Fresh Strawberry Pie

This pie is bright, beautiful and super happy, just like my friend, who loved it and IMG_5433marveled how something so easy could be so, so good. Farm fresh strawberry season is fleeting, like good memories, and fresh berries are what you want here, so hit the farmer’s market (as Maria did weekly) to get the freshest you can find.

PREPARATION

Two quarts farm fresh strawberries, picked over with the prettiest berries set aside (about 12-14 berries).

9-inch pie pan

Crust:

  • 10 oz finely crushed Walkers or Lorna Doone shortbread cookies
  • 6 Tbs melted butter
  • 1Tbs sugar

Combine crushed cookies, butter and sugar in a bowl and toss with a fork or your hands until well combined. Press mixture evenly into bottom and sides of pie pan. Freeze crust for at least 30 minutes.

Filling:

  • ½ – ¾ c sugar (to taste depending on berry sweetness)
  • 3 Tbs cornstarch
  • 3 c diced strawberries
  • 1 Tbs fresh lemon juice

In a small bowl, whisk together the sugar and cornstarch. Set aside. In a medium bowl, mash strawberries with a potato masher until goopy. Whisk in the sugar/cornstarch and lemon juice. Transfer to a medium saucepan and bring to a boil, stirring often. Let cook 2-3 minutes until thickened and jammy. Give it a couple of stirs, remove from heat, and pour into bowl to cool to room temperature.

Pour the cooled filling into the prepared pie shell and chill for at least 2 hours to fully set.

Serving:

  • ¼ c strawberry preserves, melted and strained
  • 12-14 reserved strawberries, cored and sliced in half
  • Freshly whipped cream

IMG_5432Arrange berries, cut side down, over the pie filling, pressing down lightly so the edges submerge a bit. With a pastry brush, lightly dab the berries with the melted preserves to glaze.

IMG_5435Serve immediately with fresh whipped cream on the side. Should you have any leftovers, the pie keeps 1-2 days, covered with plastic wrap and refrigerated. But, between dessert and breakfast servings, you’ll finish it within 24 hours.

NOTE: This recipe works equally well with fresh peaches. With peaches, I use turbinado sugar and a pinch of cinnamon plus a graham cracker crust.

Advertisement

After the Rain Apple Pie

So how is everyone? Still full? Almost done with the juice cleanse? Thanksgiving justimg_7527 doesn’t know when to quit, am I right?

My personal celebration of this holiday has, over the years, winnowed down to a solo affair. Sometimes I travel, sometimes I stay home and make my childhood favorite sides (alongside a couple of turkey slices from Whole Foods). Either way, it’s a happy holiday.

But, as with most holidays, or most days, really, the star of the show is dessert. Which I like to have a day or two later. Enough is enough on the day.

This year, I had apples on my mind. I’m not big into pies, I think I’ve said this before. But I was feeling creative and decided to create my own recipe. Because when it comes to apple pie, I don’t like sweet, I don’t like gluey, I don’t like mushy.

Earlier in the fall I created an apple tart recipe where I reduced two cups of fresh apple honeycrisp-picture
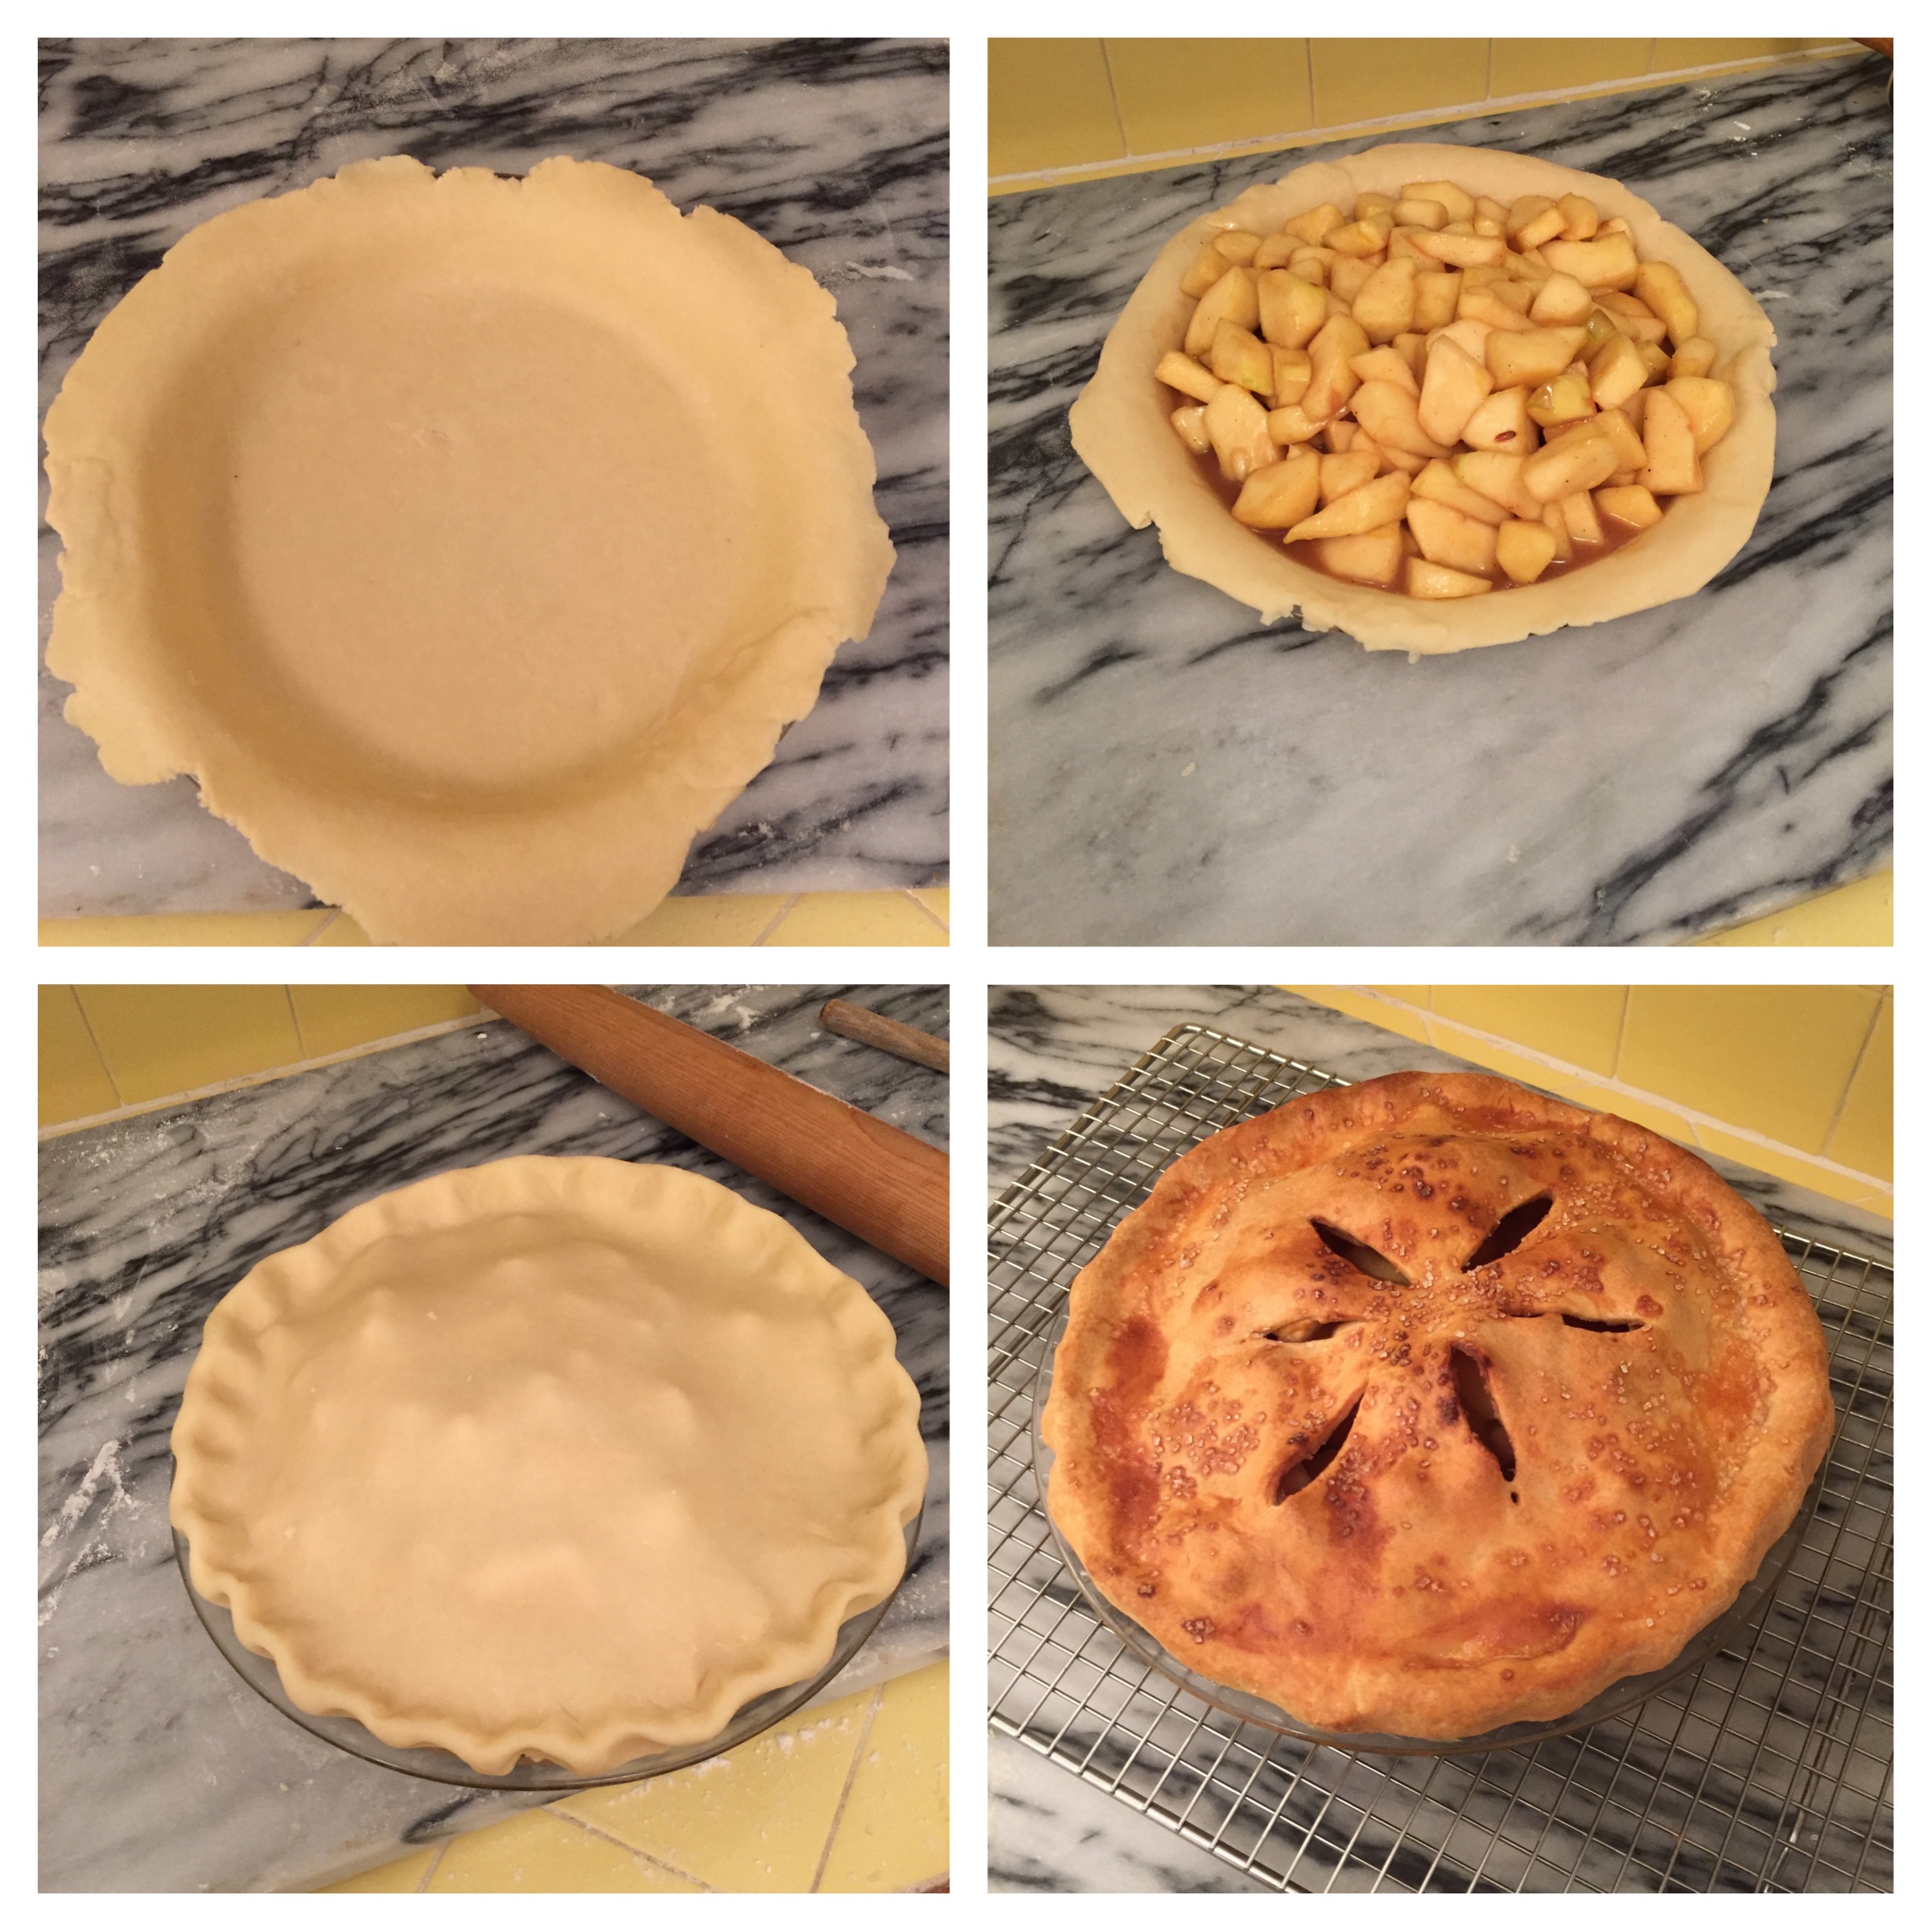
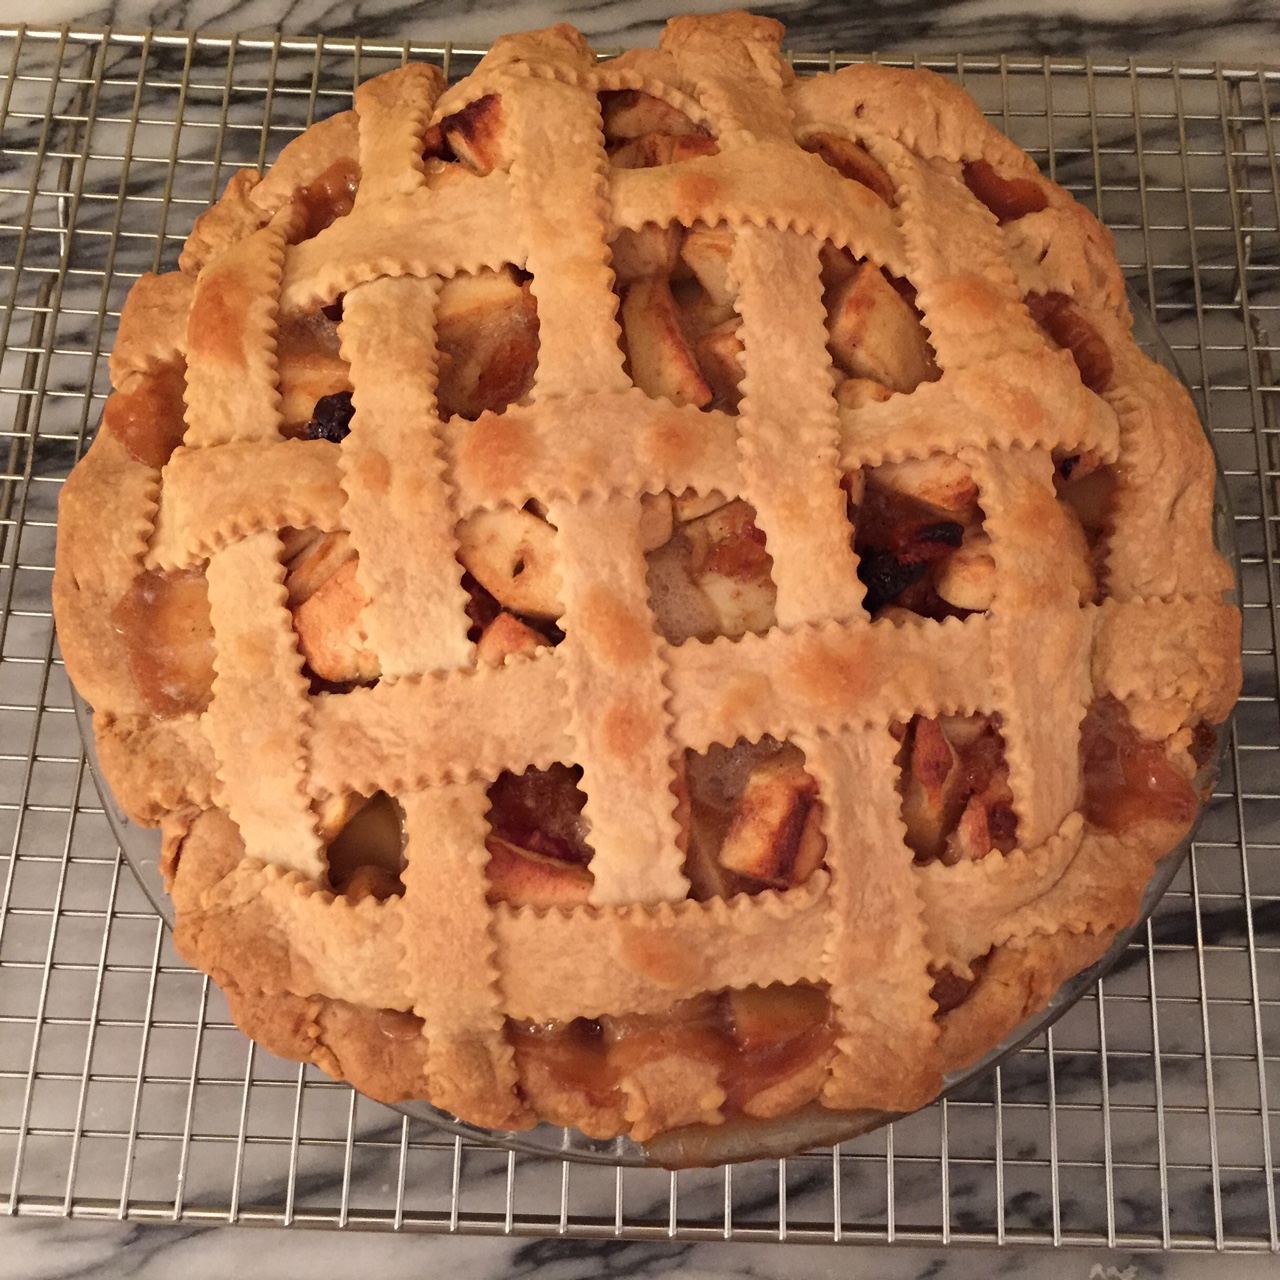
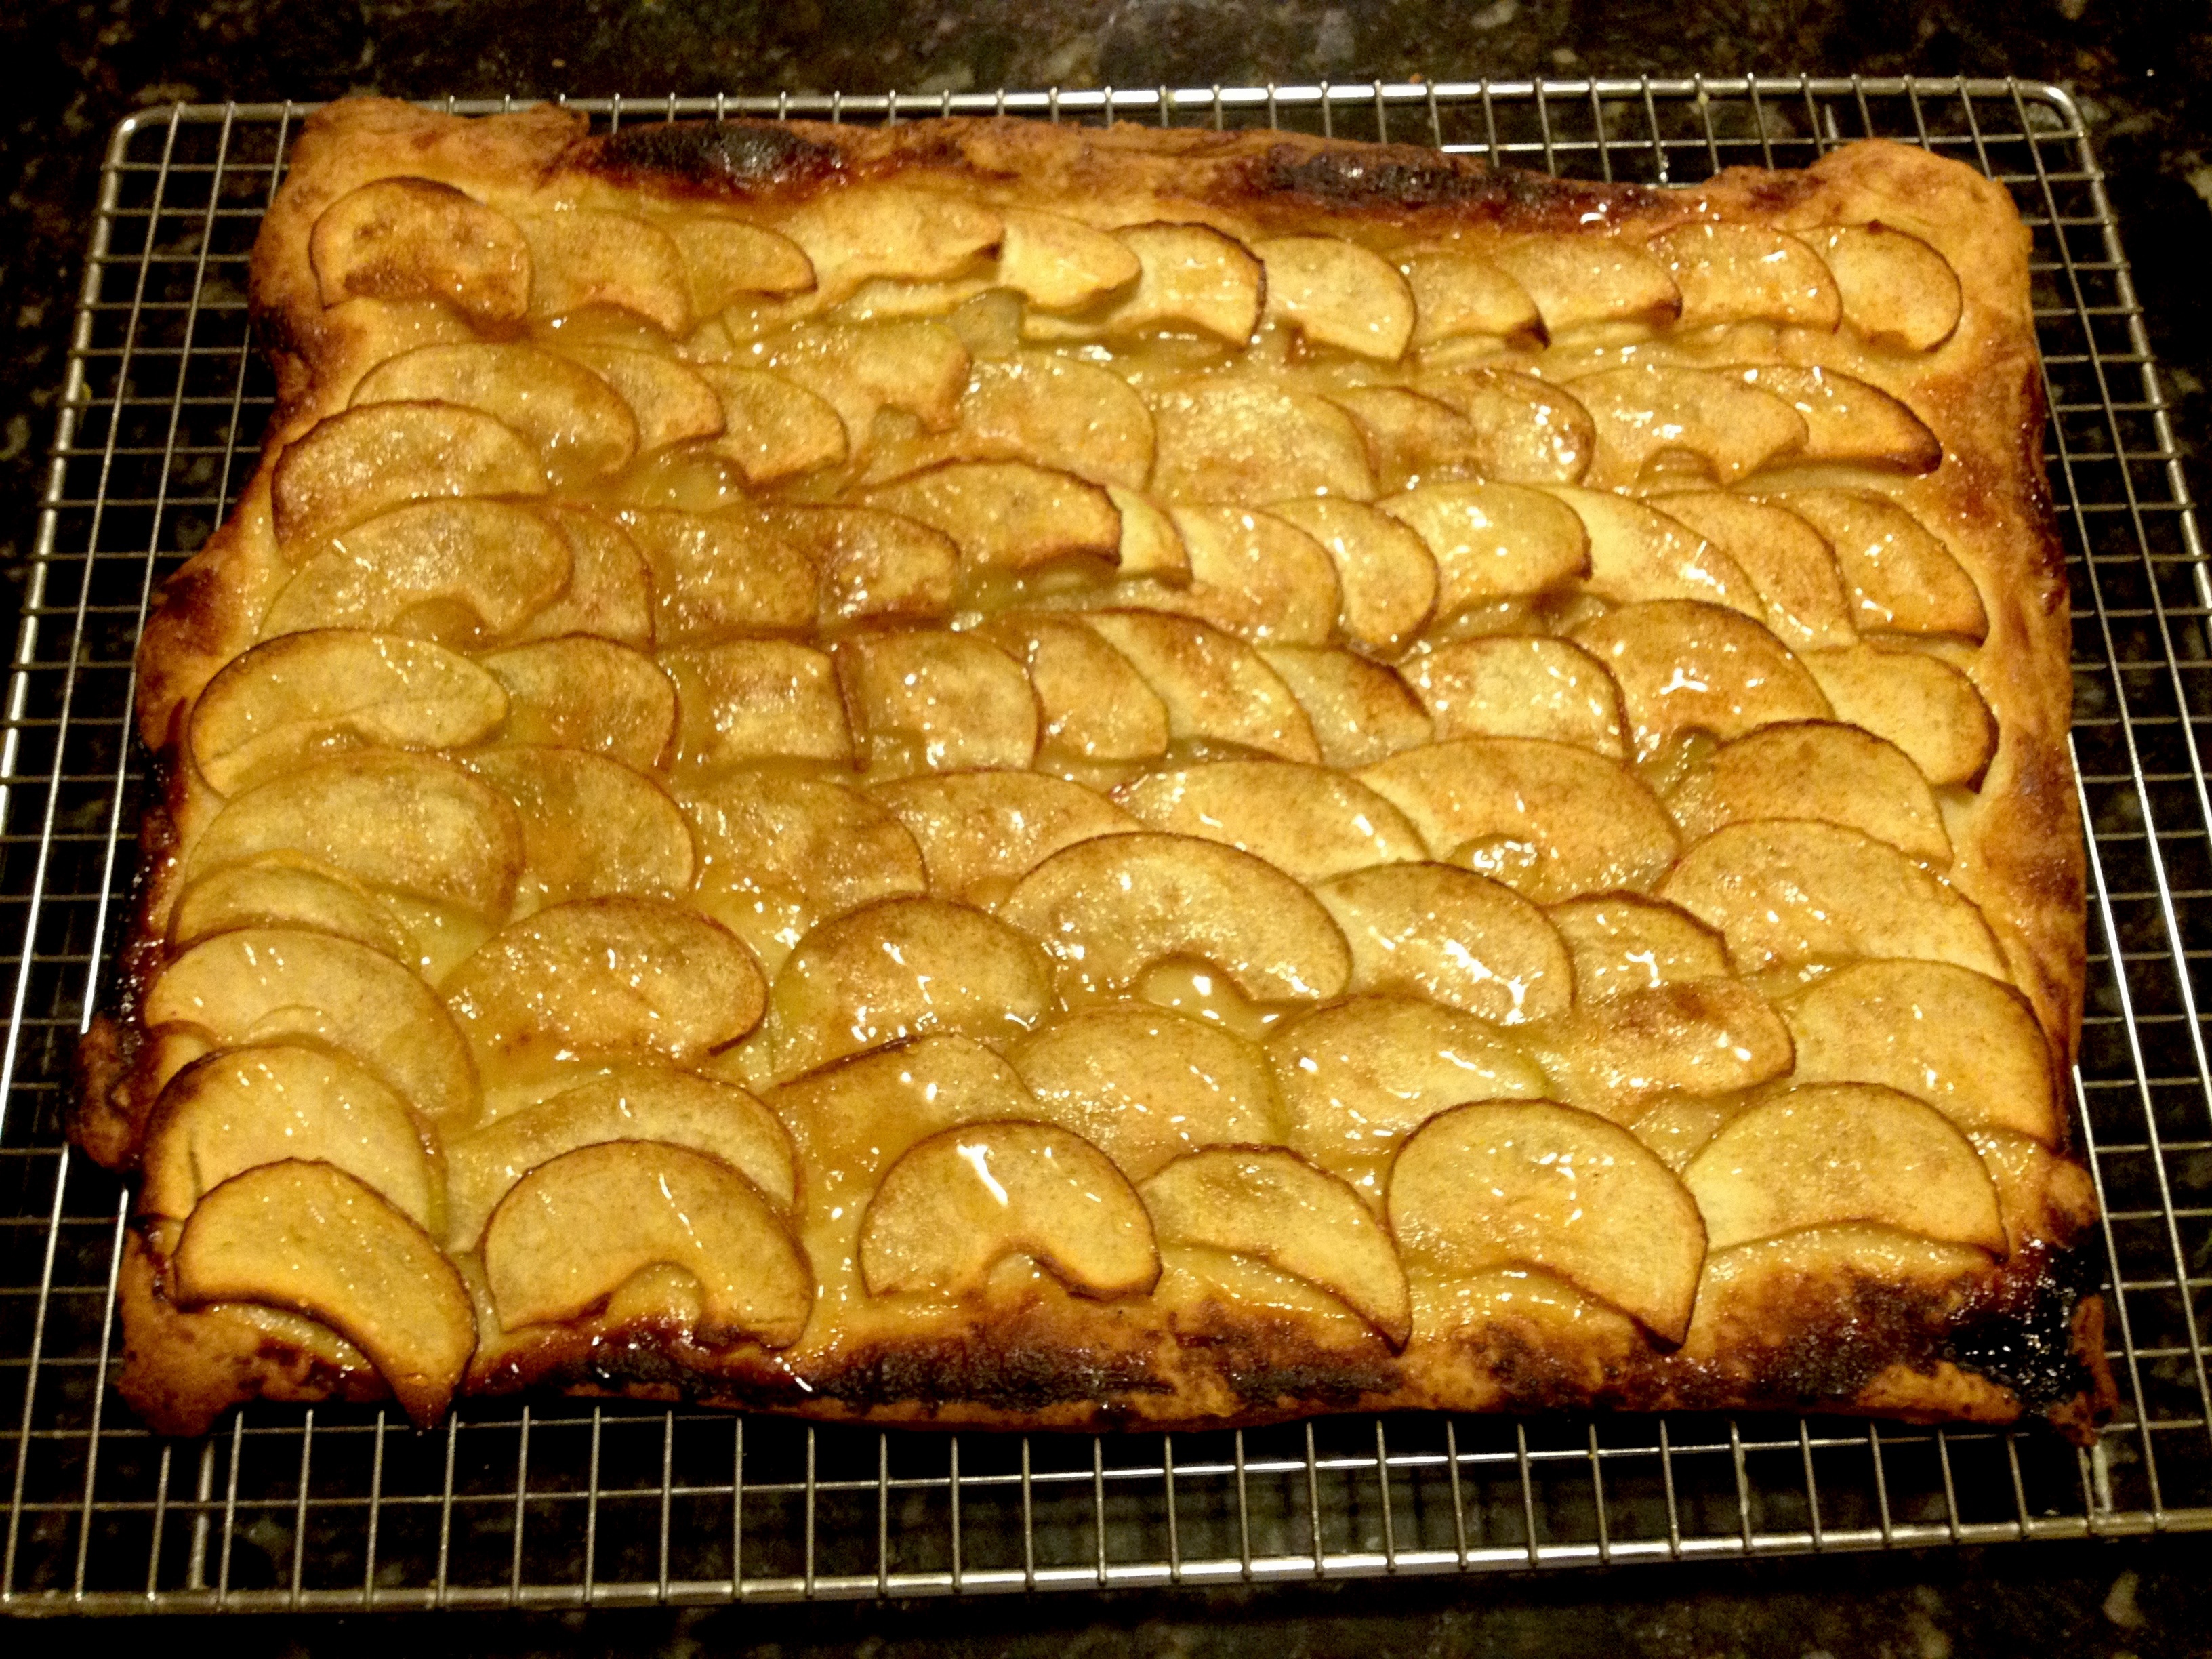
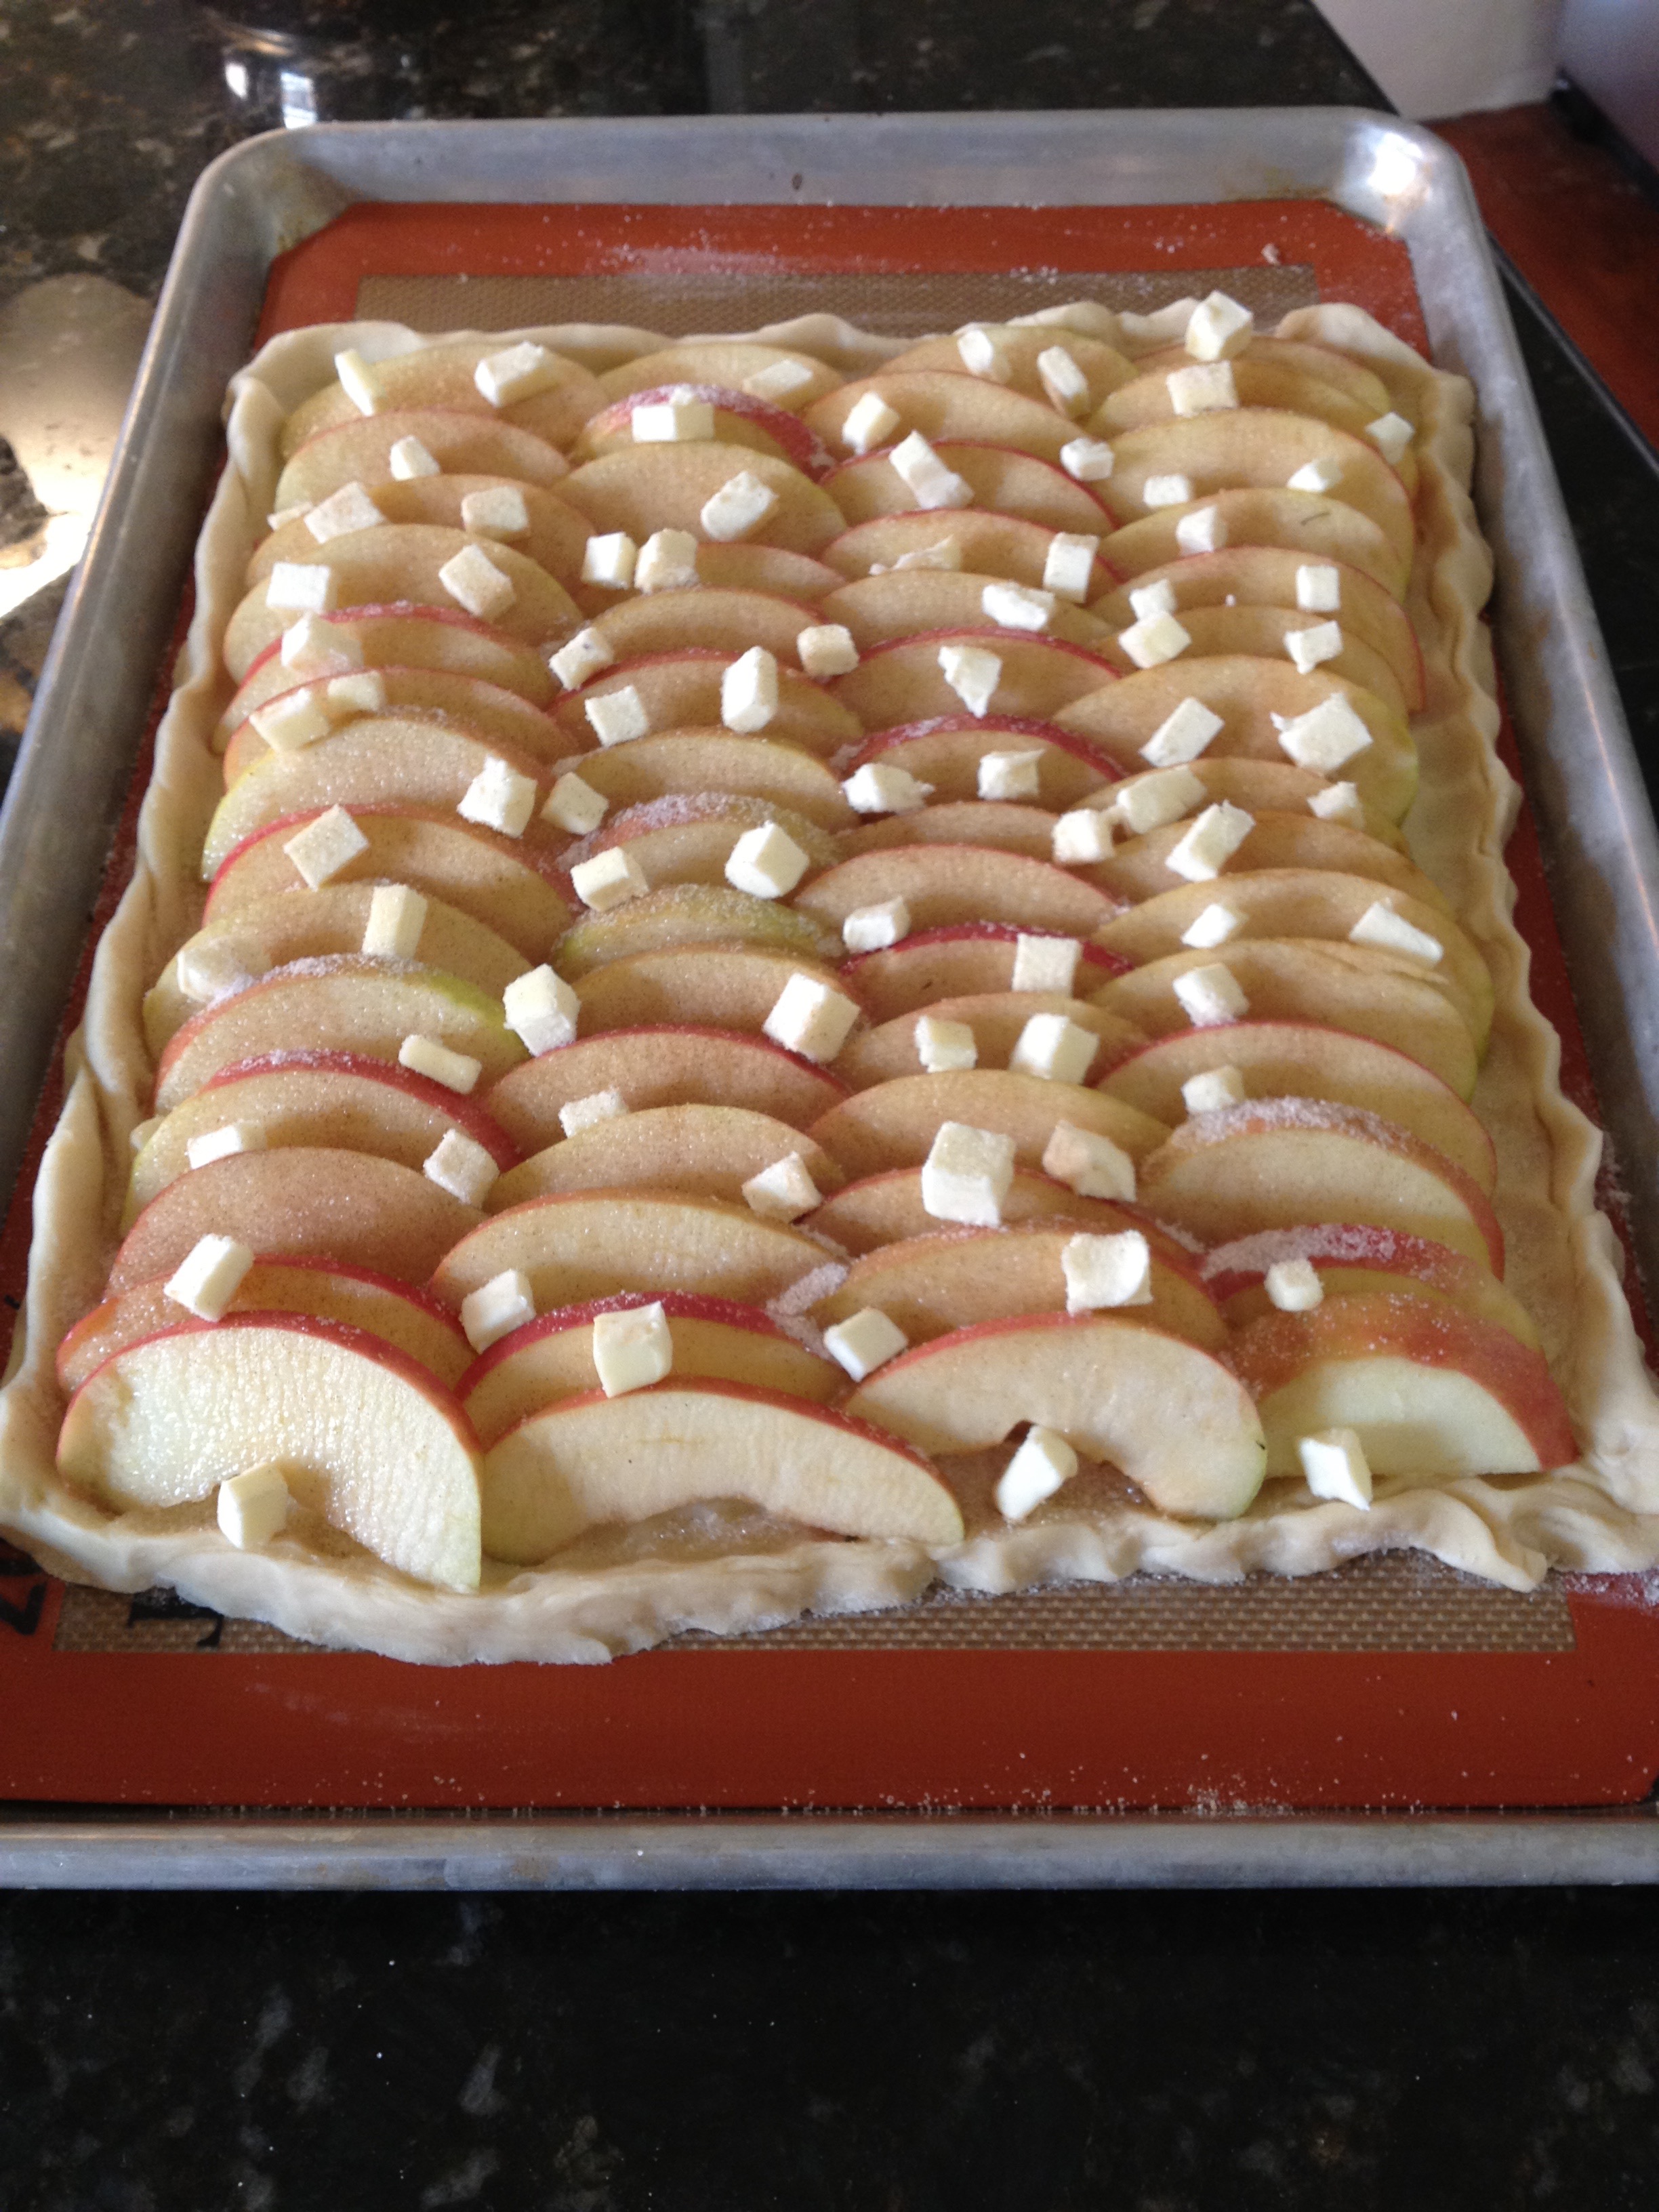
cider to about ¼ c of syrup. Let me tell you, that cider syrup is sensational! I used it to glaze the top of the tart. I kept coming back to it in my mind, so when I decided to make a pie, I started there. Added a few spices and reduced it down. Still. so. good. I used it as the sweetener for apples.

The results were very very good, exactly what I was looking for in an apple pie: Great apple flavor, hints of spice, and a mellow sweetness.

Give it a try!

After the Rain Apple Pie*

Makes one 9-inch pie

Crust

img_7525Use your favorite crust recipe for a double crust pie. I always go all butter, but I know some of ya’ll like your Crisco. If it tastes good to you, it’ll taste good in this pie.

Divide your pie dough into two pieces, and roll each into a 13-inch  circle. Line a 9-inch glass pie plate with one circle, trimming to a ½-inch overhang. Cover the pie plate and the second circle of dough with plastic wrap and refrigerate while making the filling.


Filling Ingredients

2 c fresh apple cider, well shaken

One cinnamon stick

One star anise

Six whole cloves

About 6 whole black peppercorns

2 lbs Honeycrisp apples

Zest from one lemon

2 Tbs lemon juice

2 -3 Tbs tapioca

¼ c turbinado sugar

1 whole egg + 1 tsp milk for eggwash

Crystal sugar for sprinkling

Preparation

Add the cider and spices to a small saucepan and bring to a boil. Lower heat to maintain a strong simmer and reduce the cider to about 1/3 cup. This can take about an hour. It tends to bubble up so remove the pan from the heat frequently and stir to check consistency. You want it to coat the back of your spoon.

While the cider is reducing, prepare the apples. Wash and dry the apples. I like to leave the skin on. Core and cut into quarters, and, using a mandolin on the ¼” setting, slice the apples into a large bowl. Add the lemon zest and lemon juice, and stir to coat the apples. Add the tapioca and stir to thoroughly mix it in. Set apples aside. (My pie turned out super juicy using only the 2 Tbs of Tapioca. If your apples are juicy, use the 3 Tbs.)

When the cider has reduced to a syrup, pour it into a heatproof measuring cup and set aside to cool for about 10 minutes.

Preheat the oven to 425 degrees. Position a rack in the center. Place a baking sheet on the lower rack to catch any drips.

Remove the pie plate and dough circle from the refrigerator. Brush the bottom, sides, and overhang of the crust with the egg wash.

Add the cooled syrup to the apples and stir well to combine. Taste an apple. If you want more sweetness, add up to ¼ c of turbinado sugar sprinkled over the apples and stirred to combine.

Mound the apples into the pie plate, pressing down to reduce the space between slices. Brush the rim of the crust with additional egg wash and lay the remaining circle of dough over the top of the apples. Fold the edge of the top crust under the overhang and crimp.

Brush the remaining egg wash over the entire pie, sprinkle with crystal sugar, and cut slits for steam.

Place the pie on the center rack and bake for about 20 minutes until the crust starts to brown. Reduce the heat to 350 degrees and bake for an additional 40-50 minutes until the crust is golden brown, juices are bubbling, and a thin sharp knife inserted into the slits meets little resistance from the apples.

Cool on a rack and serve warm or at room temperature. A dollop of crème fraiche or barely sweetened whipped cream is a nice touch.

Enjoy!

*Why “After the Rain”? Because I did make it a day after a rare Los Angeles rainstorm and because nostalgia, life, the election — it’s a lot.


Seven Days of Cookies: Mom’s Brown Butter Markka

Whew! We made it, a whole week of cookies! If you’re feeling like me, youIMG_3666 may never want to eat another cookie again! Until next year. Or next week. You know.

We’re closing the week with a cookie my mother made every year. It’s one she remembered her own mother making during the holidays, and those back-in-the-day Finns, they didn’t write anything down. You learned by doing and then you remembered. So no matter how often I asked mom to transcribe her memory, she never did. So what I offer you here is my memory of this recipe.

These call upon two of the baker’s primary abilities: Patience and faith. Patience because this dough is very touchy and the resulting cookies very delicate. And faith that the greasy looking glop you end up with will (will!) result in a delicious cookie.

BTW, “Markka” are Finnish coins no longer in circulation. But again, back in the day, we all would’ve known what these were. If we were Finns.

Notes

  • Patience throughout is key. Browning the butter, chilling the dough, shaping the cookies. Slow and easy.
  • Make sure your stove is set to medium heat for the butter browning and do stir constantly. 12 minutes will go by quickly. You may get
    IMG_3662

    Browned butter!

    some frothing that will cause you to wonder if you’re doing this correctly. You are. Keep stirring. The butter browns and releases that nutty fragrance at about minute 10 or 11. Wait for it, keep stirring, and pull it off the heat at 12 minutes. If you get anxious at any point, simply lift the pot off the heat for a few seconds, but keep stirring. You hear me on the stirring, yes?

  • Add the dry ingredients to the butter! It makes a difference! I don’t know why!
  • Once the dry ingredients are incorporated you will feel forlorn. What you have in the bowl is not dough, it’s hardly even batter. Faith, dear reader.
  • Forming the cookies. More patience. This is a good time to rewatch the 1995 BBC production of Pride and Prejudice. Because it takes some time to form these markka.

In the end, after all that work, you will have a scrumptious cookie. They IMG_3665
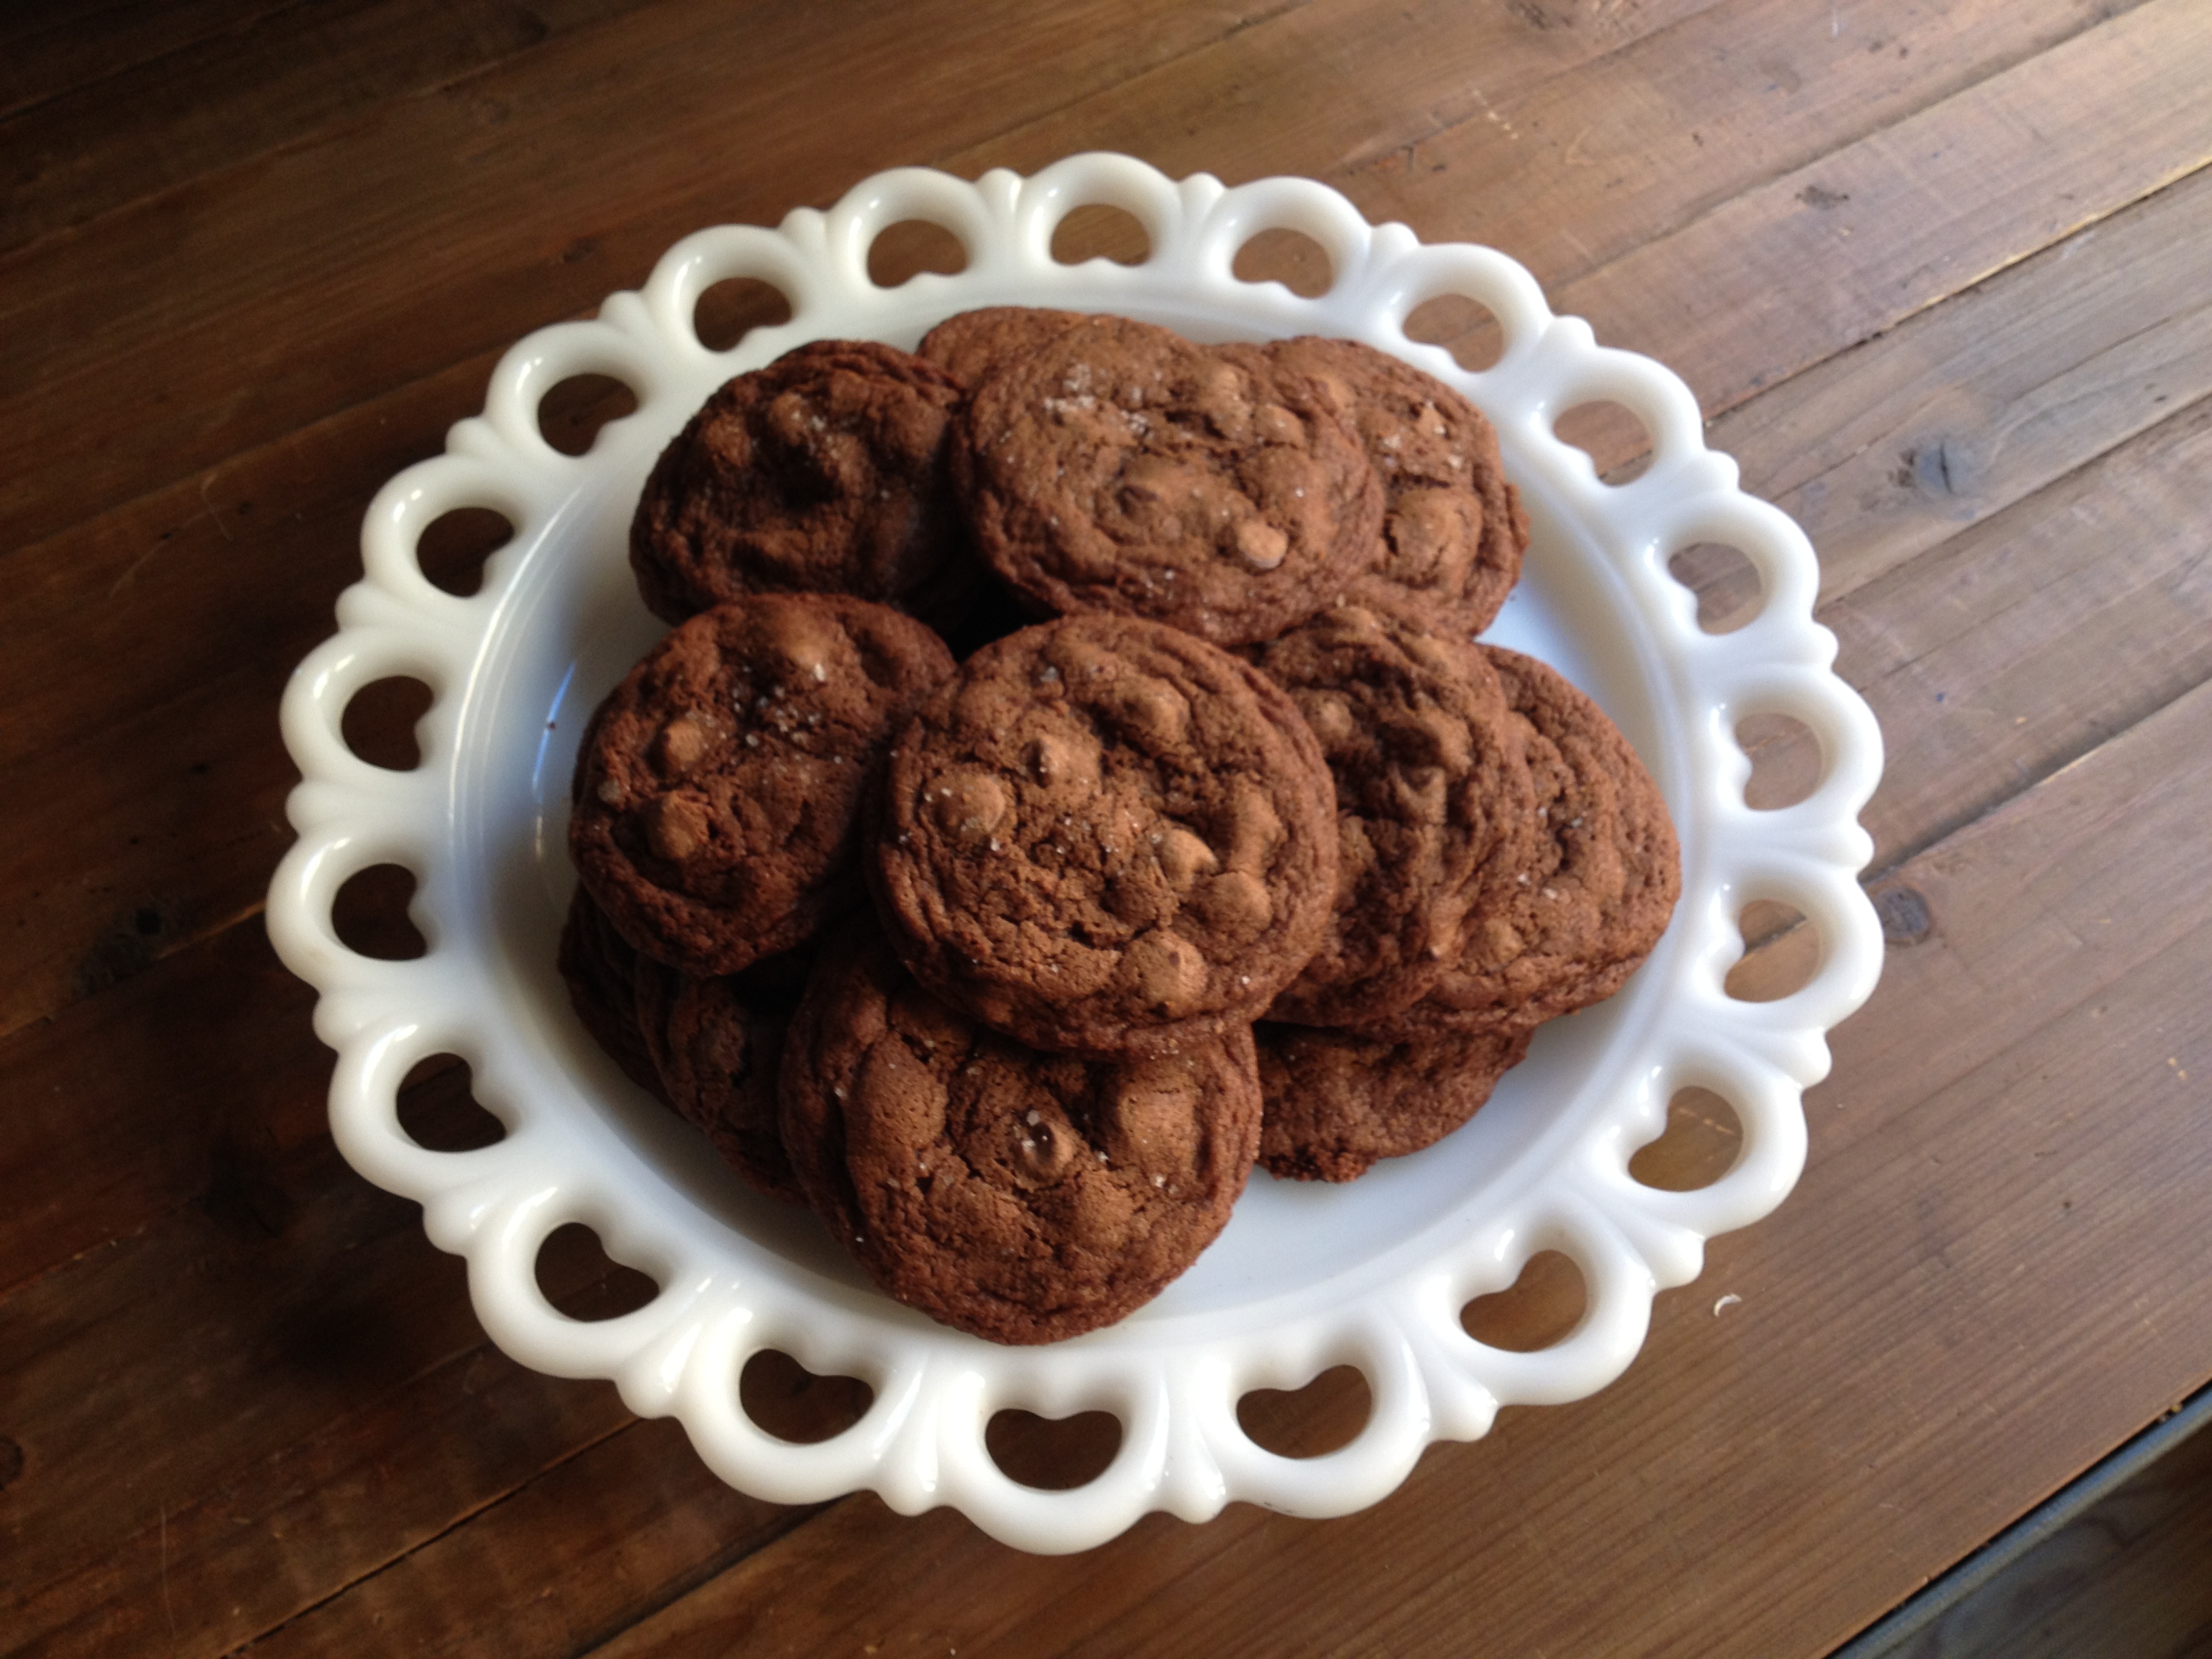
are shortbread delicate so it’s best to store in a sturdy airtight container. (They don’t really ship well either.)

These are terrific with tea or a lovely little glass of sauternes.

Enjoy!


Mom’s Brown Butter Markka

Ingredients

1 scant cup unsalted butter (2 sticks), cut up

2 tsps vanilla

2 cups flour

1 tsp baking powder

1/2 c granulated sugar

1/2 tsp salt

Crystal sugar (for topping cookies)

Preparation

Line two large baking sheets with parchment and set aside.

Put butter in a 1.5 quart sauce pan. (Stainless steel is best because you want to be able to see the color of the butter as it browns.) Set the pan over medium heat and set your timer for 12 minutes. Start stirring. Keep stirring. The butter may foam up and start to look almost fluffy. Just keep stirring, it will settle down before you’re done.

Pour the browned butter into a large mixing bowl and set aside to cool while you assemble your dry ingredients.

Stir the flour in your storage container to aerate it and then measure 2 cups using the dip/sweep method. Add the baking powder, granulated sugar and salt, and whisk together gently.

Add the 2 teaspoons of vanilla to the browned butter. Then add half the dry ingredients to the butter. Stir gently to incorporate. Add the remaining dry ingredients and again, stir to incorporate.

So not pretty.

Scrape the dough into a smaller bowl, cover the top with a sheet of plastic wrap and chill in the fridge for two hours. Remove from the fridge and let stand at room temperature for about 20 minutes.

IMG_3664

You really will need to scrape.

Preheat the oven to 350. Position racks in the upper and lower third of the oven.

Use a small (#00) ice cream scoop to scrape up dough. It will shave and shard and that’s ok. Dump your scoopful of dough into your hand and warm it between your palms. Give it a minute and it will soften into a lovely, workable little ball of dough.

IMG_3663

To achieve this.

Roll it into a ball, flatten it slightly and place on the baking sheet. Repeat until you have 8 cookies per sheet. Sprinkle with the crystal sugar and press down on it a bit to make sure it sticks.

Bake for about 15 minutes until golden brown around the edges, rotating the sheets top to bottom halfway through.

IMG_3667

Et voila!

Let the cookies cool on the sheets for about 10 minutes before gently moving to racks to cool completely.

Yields about 24 cookies.


Seven Days of Cookies: Dark Chocolate Crinkles

When I first moved to LA back in the 90s, one of my favorite haunts was acookies bookstore on Third Street called The Cook’s Library. It was devoted entirely to cookbooks. It was heaven. I’d plunk myself down on the floor and lose myself for an afternoon reading about European pastry. The staff were always friendly and nice. It was heaven. It closed in 2009 after 20 years. I miss it.

One of the books I bought there was a sort of coffee table style book on European

cooks library

Photo: LA Times

chocolate recipes. I would tell you the name, even show you a picture, but alas, the book is packed into a box that’s packed into a storage locker. The first Chocolate Crinkles I ever made were from that book. They were plump and tasted like moist, delicious brownies. (The chocolate Bouchons served and sold at Bouchon Bakery are similar in taste/texture to the Euro Crinkle.)

Over the years I’ve tried a few other Crinkle recipes. None delivered the same tallish, rounded cookies. But I found that I prefer the flatter crunchy-chewy version. And the best recipe I’ve found is from Cook’s Illustrated.

Notes:

  • Follow the directions as written, mixing the ingredients gently but thoroughly (I use a hand mixer on low).
  • Spring for the good chocolate. (I use Valhrona natural cocoa and Scharffenberger unsweetened chocolate.)
  • Add the suggested espresso powder for incredibly deep flavor.
  • Don’t be afraid of the dough! It will be runny like a cake batter when you’re done mixing. Let it sit on the counter as directed. It will firm up but it will always be super soft. Handle with care!
  • Check your oven temperature for accuracy because you don’t want to bake these any longer than 12 minutes. There’s a fine line between chewy and underdone, I know. Trust the recipe and verify your oven temperature!
  • The recipe says to make two sheets of 11 rolled balls. I do not. I make three sheets: Two of 8 balls and one of 6 balls. It’s just how I do.
  • Use the ice cream scoop if you have one. It’s the easiest wayreindeer to handle the soft dough.

Not only are these cookies delicious, I think they are one of the prettiest holiday cookies. I love the bright white sugar against the dark surface cracks.

Enjoy!

Dark Chocolate Crinkles

Adapted from Cook’s Illustrated

Ingredients

1 c (5 ounces) flour

½ c (1 ½ ounces) unsweetened cocoa powder

1 tsp baking powder

¼ tsp baking soda

½ tsp salt

1 ½ c packed (10 ½ ounces) brown sugar (if weighing, no need to pack it)

3 large eggs

4 tsp instant espresso powder (optional)

1 tsp vanilla extract

4 ounces unsweetened chocolate, chopped

4 Tbs unsalted butter

½ c granulated sugar

½ c confectioners’ sugar

Preparation

Preheat oven to 325. Position rack in center of oven. Line three large baking sheets with parchment and set aside.

Whisk flour, cocoa, baking powder, baking soda, and salt together in bowl.

In a separate large bowl, combine brown sugar, eggs, vanilla and espresso powder (if using). Mix with a hand mixer on low until well combined.

Put chopped chocolate and butter in a heatproof glass measure and microwave at 50 percent power, stirring every 30 seconds until melted.

Add melted chocolate to the egg mixture. Mix on low speed until combined.

Add flour mixture in two additions, mixing on low until just combined (no dry streaks remain). The dough will be wet and runny, like a brownie batter.

Let dough sit at room temperature for 10 minutes.

dough ballsPlace granulated sugar and confectioners’ sugar in separate shallow dishes. Working with 2 tablespoons dough (or use #30 scoop), roll into balls. Because the dough is so soft make your balls by gently tossing the dough back and forth in your hands. Immediately drop the dough balls into the granulated sugar and gently roll to coat. Transfer dough balls to confectioners’ sugar and roll gently to coat evenly.

Place 8 dough balls, evenly spaced, on two of the prepared sheets, and 6 on the third sheet.

Bake cookies, one sheet at a time, until puffed and cracked and edges haveIMG_3642 begun to set but centers are still soft (cookies will look raw between cracks and seem underdone), about 12 minutes, rotating sheet halfway through baking.

Let cool completely on sheet before serving. Yield 22 cookies.

These are best the day they’re made, but can be kept in an airtight container for about 3 days.

A Tale of Two Pies (and One Tart)

My mom kept a tub of Crisco in the fridge. She’d toss some tablespoons of the coldIMG_3067 shortening into a bowl of flour, cut it in, add some water, knead it together with her hands. She’d roll it out, line a pie plate. Fill it with cut up apples (skins on), cinnamon sugar, and dots of butter. Seal it with a top crust and bake it up. Delicious smell, delicious taste, with a modicum of effort. A terrifically simple apple pie.

The same cannot be said for the day long endeavor of a pie I made this weekend. I’ll temper my remarks by saying that I’m not a huge apple pie fan. I like it. If it’s there I’ll eat it. But I’m not going to order it at a restaurant (no tarte tatin for me) or at House of Pies. But every so often I do want a baked apple something. And I had a new cookbook I was eager to try from an author I really enjoy.

As to apples. Eating-wise, I only, ONLY, like McIntosh. Or the occasional Granny Smith. Baking-wise, I know the Delicious’s are meant to be the best, but I use Pink Lady. Because I like pink and because I like the quaint name. Just sayin’. You can use whatever apples you like.

Back to the pie…. I read the recipe, or at least I thought I did, but throughout preparation I felt like it kept surprising me…. “Wait, what, I have to freeze this? I have to reduce this? I have to chill it for how long?” Perhaps it was a combination of my vision problem and the fact that the recipe preparation was written in long paragraphs. Whatever it was, it seems I can no longer work that way. I need bullet points.

4 pieThe instructions included lengthy macerating of apples, chilling of dough, chilling of pie, resting of pie, among other tasks and rests and waits. And in the end, after all that time and effort, the result was not as good as my mom’s 20-minute version and far less pretty.

But, I like to win so I rolled up my sleeves for round two, pulling a recipe long stored in my digital recipe box for a Honey Apple Pie with Orange Lattice Crust. There’s OJ in the crust and dried fruit with the apples. What could be bad? Well, in my case, I don’t care for too much honey. But I read that you can replace honey cup for cup with sugar up to one cup. So I did, and added a little extra OJ to the fruit fordouble moisture. The pastry was easy and fun. The apples – I used Golden Delicious as specified – didn’t macerate well, no juices were released. I thought the baking would take care of that. But check after check after check, my pie was just sitting in the oven, barely breathing.

WTH? Then I checked my heat – started at 425 for 10 minutes then reduced to 350. Sure enough, my dodgy oven was hovering at about 325. I nudged it up, checked again after 10 minutes, et voila! Bubbling juices! I let it go for IMG_3060another 10-15 minutes. It browned, more bubbling juices. I feared for flavor after all that time in the oven, but it wasn’t a problem. The result is a pretty, not-too-sweet pie. If you make it, and I suggest you do, here are some adjustments:

  • Orange zest in the crust in addition to juice.
  • More sugar in the crust – as it, it’s great for a savory pie. It needs a bit more oomph.
  • More dried fruit – it calls for 2 Tbs  each of diced cherries, apricots and peaches; increase to 4 Tbs each, and soak in cognac along with the OJ.
  • More spice in the filling. The cinnamon comes through subtly, the cardamom not at all. Jack up the spices to taste. You could also increase the sugar, although I like it not too sweet.
  • Egg wash and sugar the lattice. It’s just prettier and tastes a bit more special.

A great effort, but still not a total win. So I made what always works, what I call “Apple Pizza” which is just a version of Ina Garten’s Apple Tart. I like how pretty it is. And it’s fun to make, especially if you have a mandoline. And, ps, this pastry is also dreamy to work with. You can’t go wrong.

A word on pastry: Get the slab. I always believed I was challenged in the pastry department. Years ago I bought a large plastic slab that had a rough surface. This was meant to be ideal for preventing pastry from sticking. It didn’t work very well, my results were not worth the effort. Then, a few years ago, I had a lovely large kitchen and an even lovelier large granite island. What ho pastry! Suddenly, I was better at this. Then, last year to combat my vintage tiled counters, I bought a marble slab. Now I’m a pastry ROCK STAR. Get the slab.

IMG_2761Apple Pizza

Adapted from Ina Garten

Ingredients
Pastry

2 c flour

1/2 tsp fine sea salt

1 Tbs sugar

12 Tbs (1 1/2 sticks) cold unsalted butter, diced

1/4 -1/2 c ice water

Apples

4-6 Pink Lady apples (depending on size; use any apple you prefer)

1/2 cup sugar

3/4 tsp cinnamon (or more to taste)

4 tablespoons (1/2 stick) cold unsalted butter, small-diced

Egg wash

One large egg mixed with one Tbs of milk

Turbinado sugar

Preparation

Line a rimmed baking sheet with parchment or Silpat, set aside.

Make the pastry: Put flour, salt and sugar in the bowl of a food processor fitted with the IMG_3704steel blade; pulse a few times to combine. Toss in the diced butter and pulse until the butter is the size of peas. With the motor running, dribble the 1/4-cup ice water down the feed tube and pulse just until the dough starts to come together. The dough should be a bit sticky. Add additional water as needed just until it comes together. Dump onto a lightly floured board and knead quickly into a ball. Flatten into a thick square, wrap in plastic and refrigerate for at least 1 hour.

Preheat the oven to 400 degrees F.

Roll the dough to about 10 x 14 inches, and pinch the edges to make a slight rim. Put the rolled dough on the prepared sheet pan and refrigerate while you prepare the apples.

For the apples: Core the apples and cut into quarters. Using a mandoline set to 1/8-inch, slice four of the apples. Leave the peel on. Put your sheet of dough in front of you, short side facing you. Places the slices of apple in slightly overlapping rows across the pastry. Try to be as uniform as possible, snacking on the smaller bits of apple. Cut up another apple or two if you don’t have enough slices.

IMG_3705

I got scared of the seemingly large amount of sugar. Note the difference in appearance between this and the photo above. Use your sugar!

Mix the sugar and cinnamon together and sprinkle over the apples. It will look like a lot. Be strong and try to use all of it. Dot with butter.

Brush the edges of the dough with the egg wash and sprinkle with Turbinado.

Bake 45 minutes to 1 hour, until the pastry is browned and the edges of the apples start to brown. Rotate the pan once during cooking. If the apple juices  burn in the parchment, don’t worry, the tart will be fine! (Verbatim from Ina!)

When done, cool on sheet on rack. Loosen with spatula after 10 minutes. Serve warm. (This is also good for breakfast at room temperature.)

Variations

  • Ina’s recipe calls for finishing with 1/2 cup apricot jelly or warm sieved apricot jam and 2 tablespoons Calvados rum or water. Heat the apricot jelly together with the Calvados and brush the apples and the pastry completely with the jelly mixture. Allow to cool.
  • I occasionally make a larger rim of pastry and fill with a thin layer of pastry cream before placing the apples. Because pastry cream.

Enjoy!

Finnish Prune Tarts and the scent of love

Tonight, for the first time, I consciously considered my mother’s tools in the kitchen. I am making Joulutorttu (Finnish Prune Tarts), which require a cream cheese and butter pastry. IMG_8552 It occurred to me, as I tossed butter and cream cheese chunks into the food processor, my mother did not have a Cuisinart. She must have worked the shortening into the flour with a hand pastry cutter and that must have taken ages. And elbow grease.

We know from watching Julia Child, that practice does make it easier to whip cream by hand or make mince out of 20 lbs of onions. So perhaps my mother was simply practiced. But that doesn’t necessarily mean it was less work. But it was work she did often: Mixing yeast breads by hand, kneading and rolling dough; chopping citron for holiday cookies and stollen (and freezing because why not?); cooking down pots of fruit and sugar throughout the summer (in a kitchen with no air conditioning). I love to bake, but I don’t even like to boil water if it’s more than 80 degrees outside.

I stood in my kitchen, with the tattered hand-written recipe card, my mom’s citrus juicer and measuring cup and saw – this is what it means to bake with love. My mother sweated over those pots so we could have a bite of summer in the winter; she rolled all that dough and cut all that shortening so we could quite literally take in her love and her caretaking, her motherhood and warmth, with every bite of the things she made for us.

These thoughts filled me as I zested and squeezed oranges, rolled and warmed cinnamon sticks, and set the prunes to simmering (remembering that a low simmer helps the cinnamon infuse). I was suddenly woozy, overcome with longing for my mother. I put my 252097_10150282511387375_7182998_nhands to my hot face, smelled oranges and cinnamon, and remembered my mother’s hands, strong and capable, showing me how to roll dough.

I’m not washing my hands tonight. I’m going to get into bed and breathe my mother’s love until I fall asleep.

The due morsi of Firenze

photo 3Torta della Nonna

When I went to Italy last fall, the first dessert I had in a proper sit-down restaurant was the Torta della Nonna: Crema pasticcera layered between a top and bottom pate sucree-like crust, topped with pignoli and a generous dusting of zuccero al velo. The restaurant, a neighborhood trattoria around the corner from my Florence hotel, was about as homey as you could ask for. And on a chilly evening (after a carbonara worthy of many international texts), the waiter brought over the torta (complimenti della casa) and from the first bite, I was hooked. When I was down to my last forkful, the waiter came by; I told him I was sad because the dessert was almost over. He gently took my fork and divided that last bite into two micro-bites. “Due morsi,” he said with a smile. (That concept of “two bites” came to define my experience of Florence.)

When I got home, torta della nonna was the first thing I wanted to bake. But I held off. I wanted it to be a pure experience – which, for me, meant I wanted to bake it from an authentic Italian ricetta written in authentic Italian. Just about one year later, I made it.

The recipe: Torta della Nonna

The crust: Pastry continues to be my culinary rovina (bête noire). It simply doesn’t like to photo 1work for me. Pate sucree is a particular challenge: I have never successfully rolled it, it’s always a patch job of scraps layered and smoothed into the dish. This waphoto 3
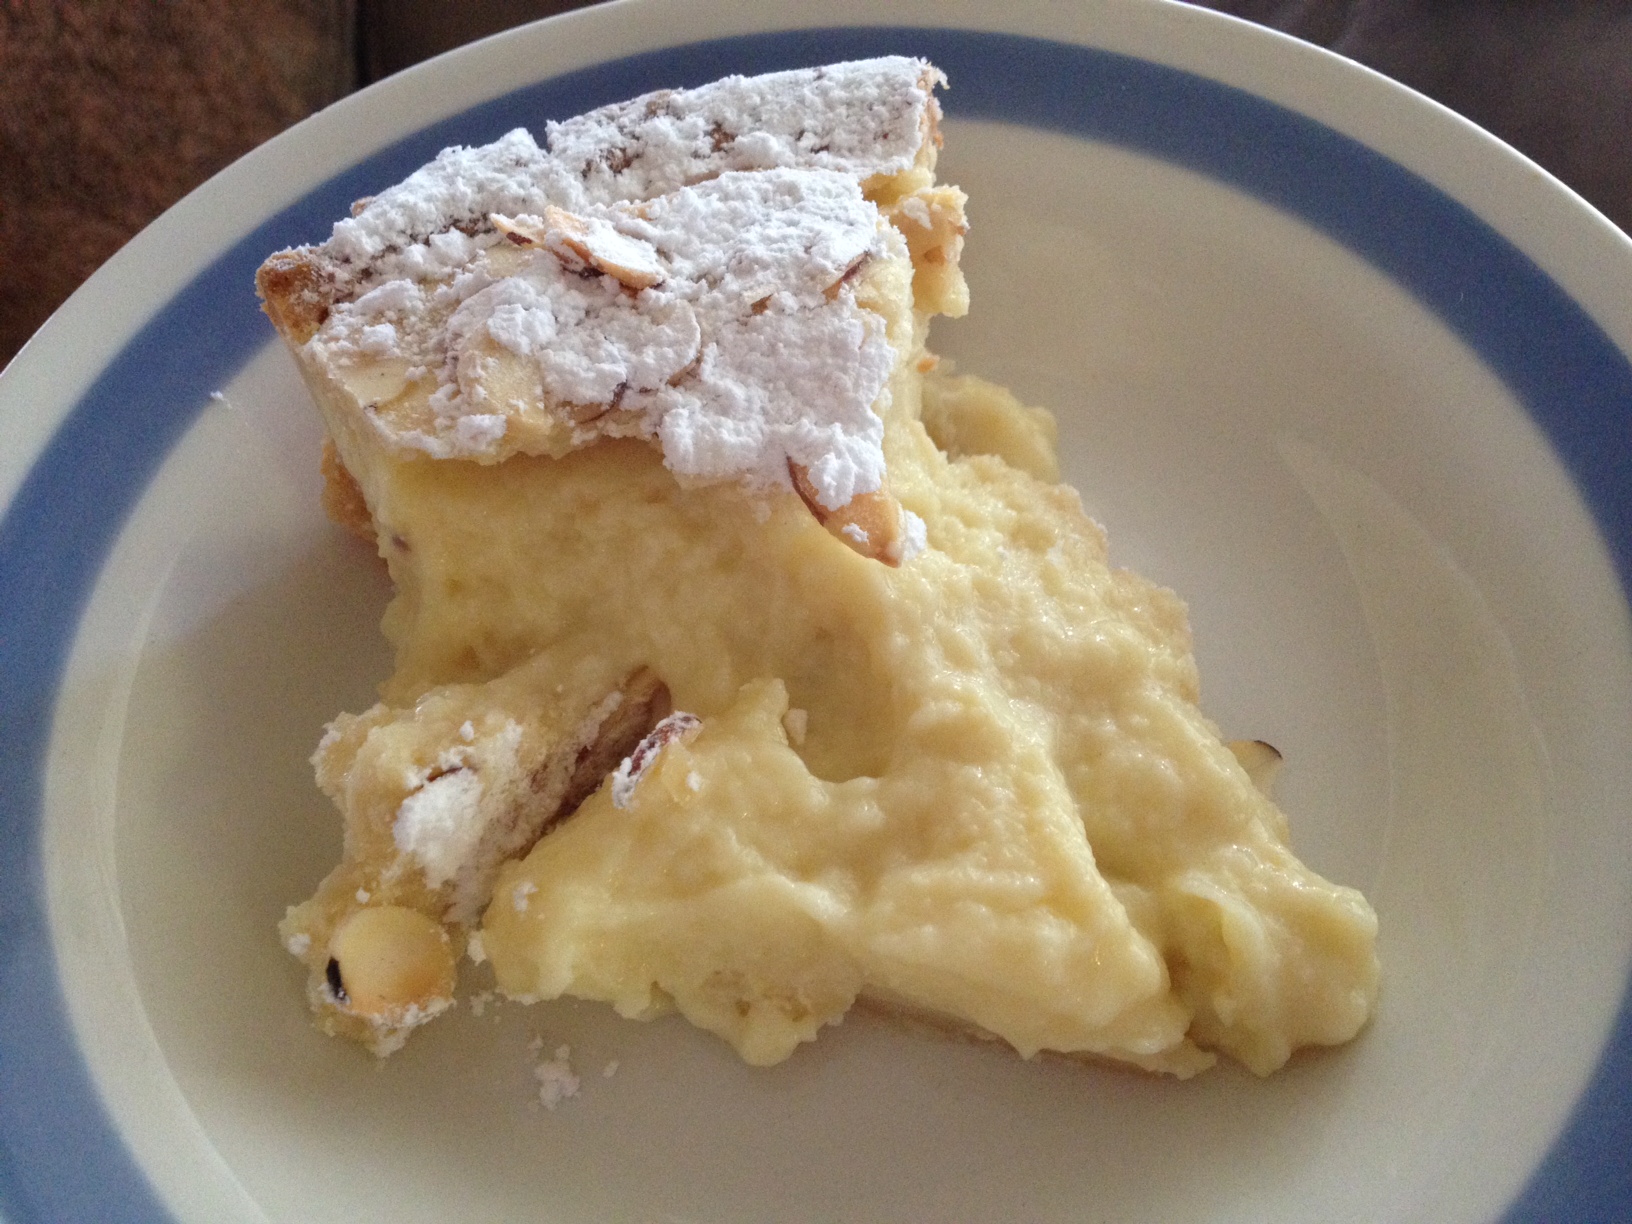
s no different. I assembled the bottom crust in pieces and for the top, I rolled it between waxed paper sheets and chilled it for 10 minutes. It worked, but it took work to aphoto 1chieve and it was, in the end, too thick. The crusts I had in Italy were very thin. Mine was about 1/8-inch and a bit like al dente pasta. (The ricetta did not call for blind baking the bottom crust, but next time I will because the pastry gives me such a hard time.)

The crema pasticcera: Friends, I could live on this and it’s something I can make in my sleep. The ricetta asked for farina rather than cphoto 2ornstarch as a thickener; it also called for what, in my opinion, was a huge amount of zucchero. The flavor was terrific (if sweet) with the lovely limona and vaniglia notes. The texture was a bit off, not super smooth like you get with cornstarch. Next time I would dial up the limona and vaniglia, cut the zucchero by a third, and use cornstarch in the crema.

Finish: Super easy, especially if you’re a dab hand with the crust. The downside is that you absolutely have to let the torta cool completely and then photo-4chill a bit before cutting. I could not wait and my portion, while tasty, was not at all pretty.

This ricetta makes a large 10-inch dessert. That’s alotta torta. I’ve got half in the freezer, will report back on how it holds up. With a bit more practice, I think Torta della Nonna will become a spring dinner party staple. Ciao!

Olive you!

San Francisco seems to be, among many other things, the city of the letterpress. There are likely as many small presses as caffe presses in town, photo 1most doing cards and many doing them memorably. At last fall’s Renegade Craft’s Fair, I bought a stack of yummy almost bespoke cards, including about 10 of these for obvious reasons.

I later realized that the card should speak to the recipient and not the sender, and I don’t know all that many bakers…. At any rate, I share them with you in case you have bakers and other clever foodies in your life. They are from Nourishing Notes which has an Etsy shop. photo 2

In researching the details , I learned that this particular card is pressed in Chicago, not the Bay Area.

Ah me.

Catching up

I hadn’t realized how long it has been since my last post! Much hasIMG_2756 changed in those nearly two years (!). I’ve moved from Los Angeles to Oakland/Bay Area. It’s been a bit of a ride, this transition, but the upside is that (a) I haven’t stopped baking, and (b) there’s a wealth of new bakeries and patisseries to discover! I always imagine I’m going to post every week and yadda yadda. No promises, just good intentions.  Promise!